In this guide, you’ll learn about UTM codes, which are the foundation for marketing campaign measurement in Google Analytics 4 (GA4).
What Is a UTM Code?
A UTM code is a snippet of text appended to the end of a link URL that points back to your website. It helps you track and measure the performance of your digital marketing campaigns.
When a UTM-coded link is clicked, it sends data to Google Analytics (GA) about the marketing campaign and associates it with the visit. So UTMs are a way to automatically collect campaign data for deeper analysis.
Check out the section of the URL below that begins with the question mark (?). This is the UTM code.
What Are UTM Parameters?
You might also hear UTM codes called “UTM parameters.” However, this is not technically correct.
The UTM code is the entire snippet of text that follows the question mark. UTM parameters are the individual bits of text within that code. Each parameter is separated by an ampersand (&).
Each UTM parameter identifies a different aspect of the marketing campaign associated with the UTM-coded link.
You can see three UTM parameters in the example below, beginning with utm_source.
UTM Parameters in GA4
There are five main GA UTM parameters:
- utm_source: The specific source or platform that is sending the traffic, like Google, Facebook, or monthly_newsletter
- utm_medium: The type of traffic like organic, paid, or email
- utm_campaign: The name of the specific marketing campaign like Fall Sale (fall_sale) or Product Launch (product_launch)
- utm_content: The name of any A/B test variant like creative_test_a or creative_test_b in a paid ad, or the name of a specific element of an email (when applicable)
- utm_term: The specific paid search keyword (when applicable)
How to Use UTM Codes
Let’s say your email marketing program contains three distinct parts: a monthly newsletter, a weekly sale email, and an automated welcome series.
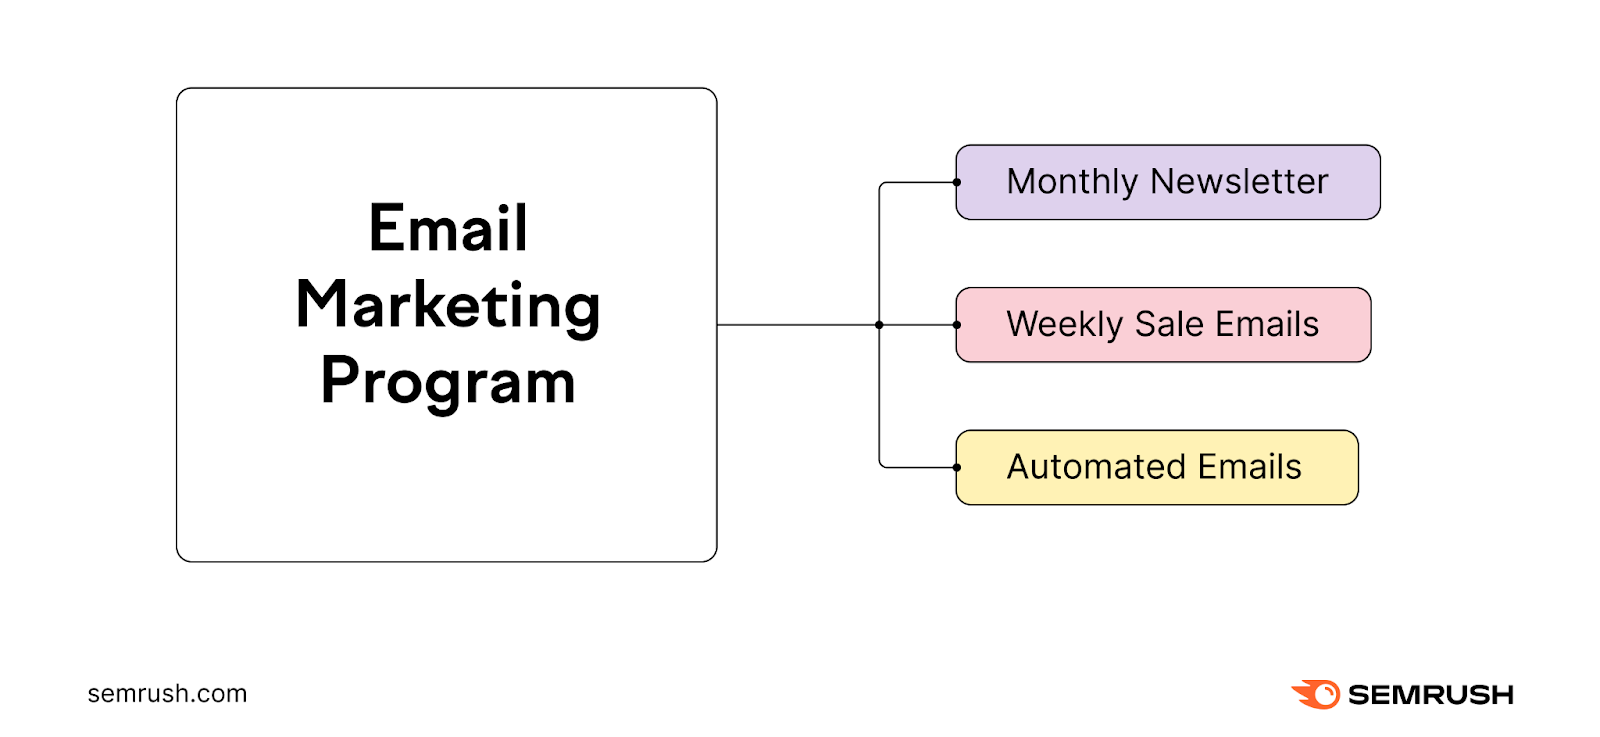
You can use four of the five UTM parameters in these emails to analyze the resulting campaign data in GA.
Per Google, UTM parameters have one core function: “to identify the campaigns that refer traffic” to your site.
So let’s look at how you might use parameters to track your weekly sale email campaign.
utm_source: You’ll use this parameter to differentiate between the three components of your email program. So you’ll use utm_source=weekly_sale to track your weekly sale email.
utm_medium: You’ll always use utm_medium=email for email campaigns. Consistently using this parameter for all email campaigns will allow you to consolidate the performance of your entire email channel in GA4 for higher level analysis.
For this campaign, it’ll look like this:
Consistently using this parameter will allow you to consolidate the performance of your entire email channel, including your weekly sale emails, your monthly newsletters, and your automated emails.
utm_campaign: Because this email goes out weekly, you might use the date as the campaign identifier:
For example:
This will also help you see which emails perform better, and use that information to improve.
utm_content: Let’s say you generate most of your revenue from your weekly sale email. You can use this parameter to test different creative approaches for the best performance.
You can do this with a split test, or A/B test, where half of your audience gets an email featuring product images, while the other half gets an email featuring lifestyle images. You can use utm_content=product_shots and utm_content=lifestyle_shots to differentiate between the two versions and track performance:
With the help of UTM parameters, you’ll be collecting the data you need to better understand the performance of your individual email campaign, your weekly sale email program, and your entire email channel.
Can You Create UTM Codes in Google Analytics?
Technically, no. If you’re using GA for UTM tracking, you can only view your UTM data there. You cannot create UTM codes in GA.
Instead, you can manually create UTM-coded URLs, or use a free tool. Google’s Campaign URL Builder offers a free tool that has everything you need to make codes and build the UTM parameters for them.
Let’s look at how to use it to generate the Thanksgiving promotion URL at the beginning of this guide. Imagine you’re the email marketing manager for a large pizza chain, and you want to track the performance of a promotional email.
First, go to the Campaign URL Builder tool.
Make sure to toggle the switch for “GA4.”

You’ll see the available fields to fill out. Three are required, as indicated by asterisks: website URL, campaign source, and campaign medium. In most situations, you’ll want to use the campaign name parameter as well, as we’ll be doing here.
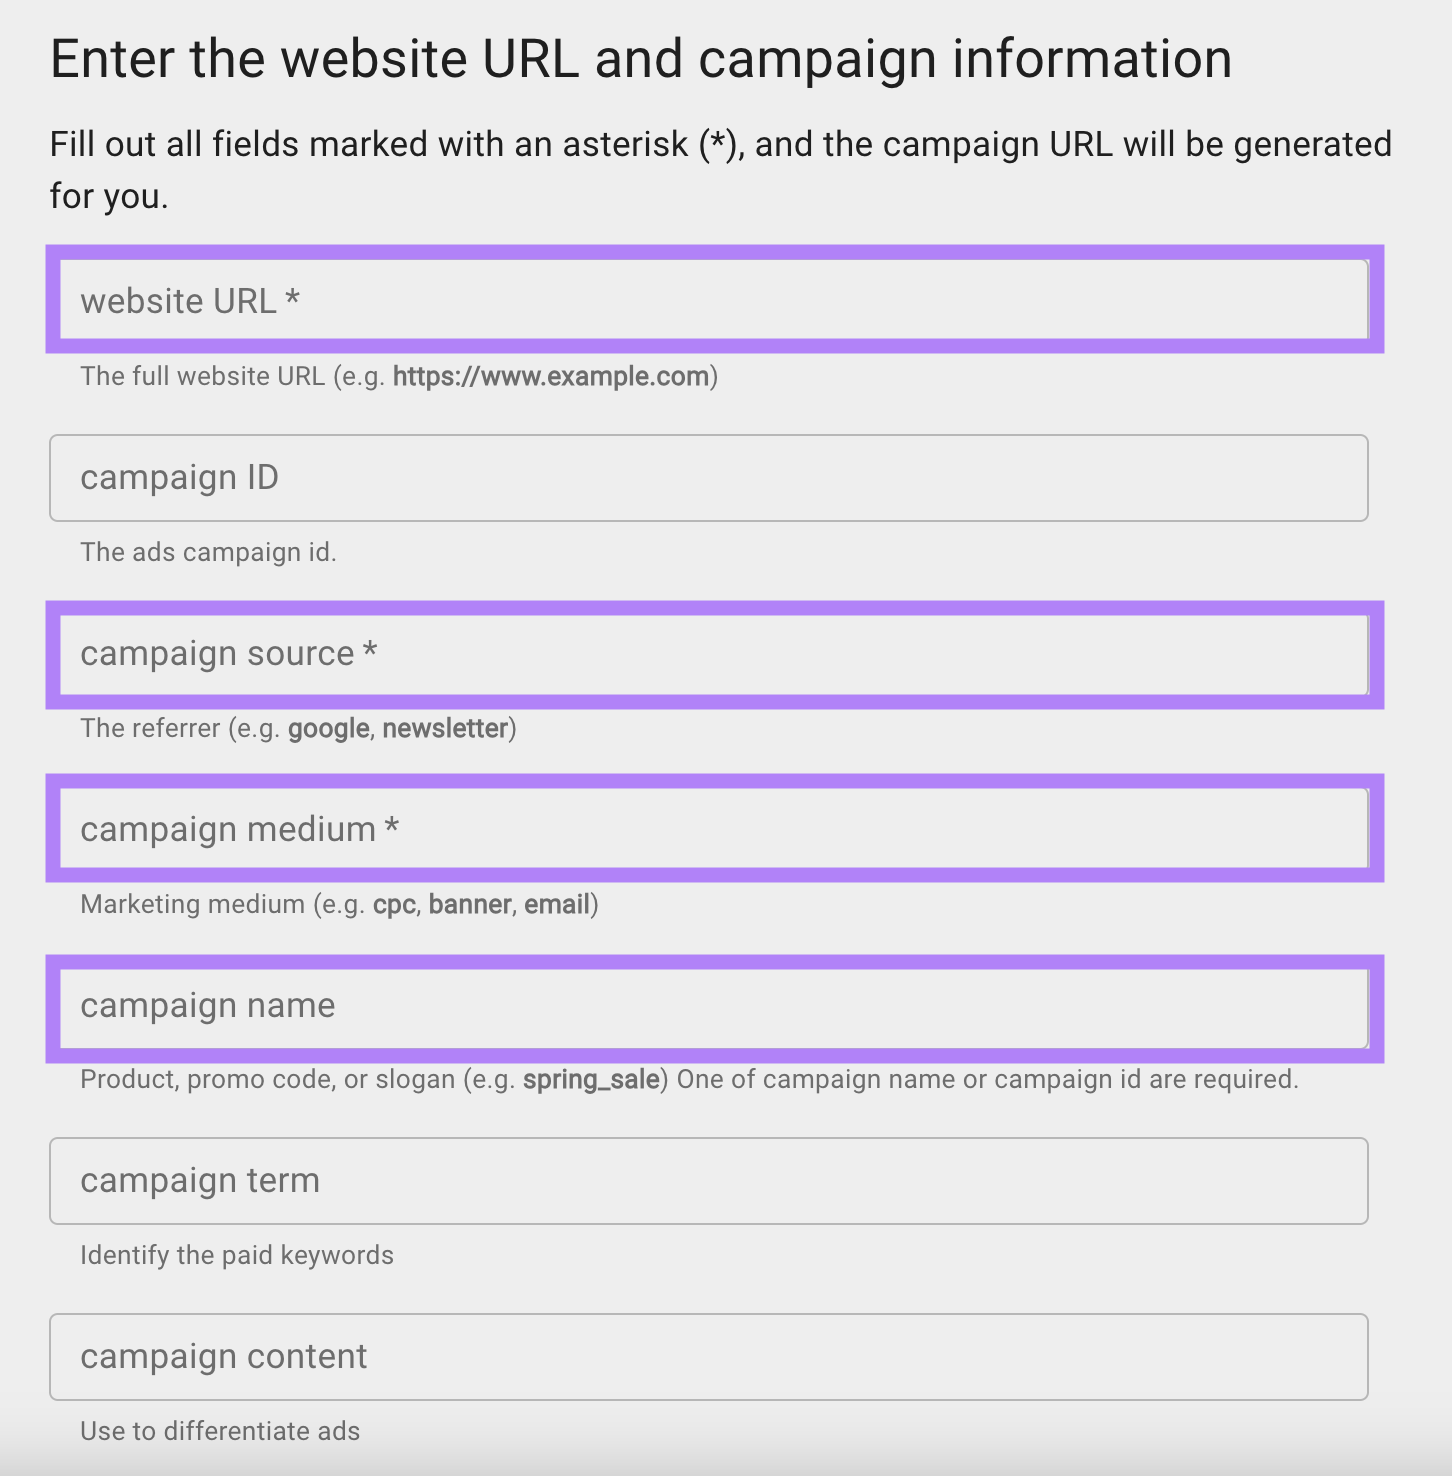
Fill out the website URL. This is the page you want visitors to land on when they click your UTM-coded link.

Next, fill out the campaign source.
This is a promotional email, so you’ll use utm_source=promotional_email.

Now, enter the campaign medium (utm_medium).

Next, enter the campaign name (utm_campaign).
The promotional offer is intended for your customers in the United States who want an alternative to turkey and stuffing, so you use thanksgiving_sale.

The URL builder tool automatically generates the UTM-coded link as you fill out the fields.
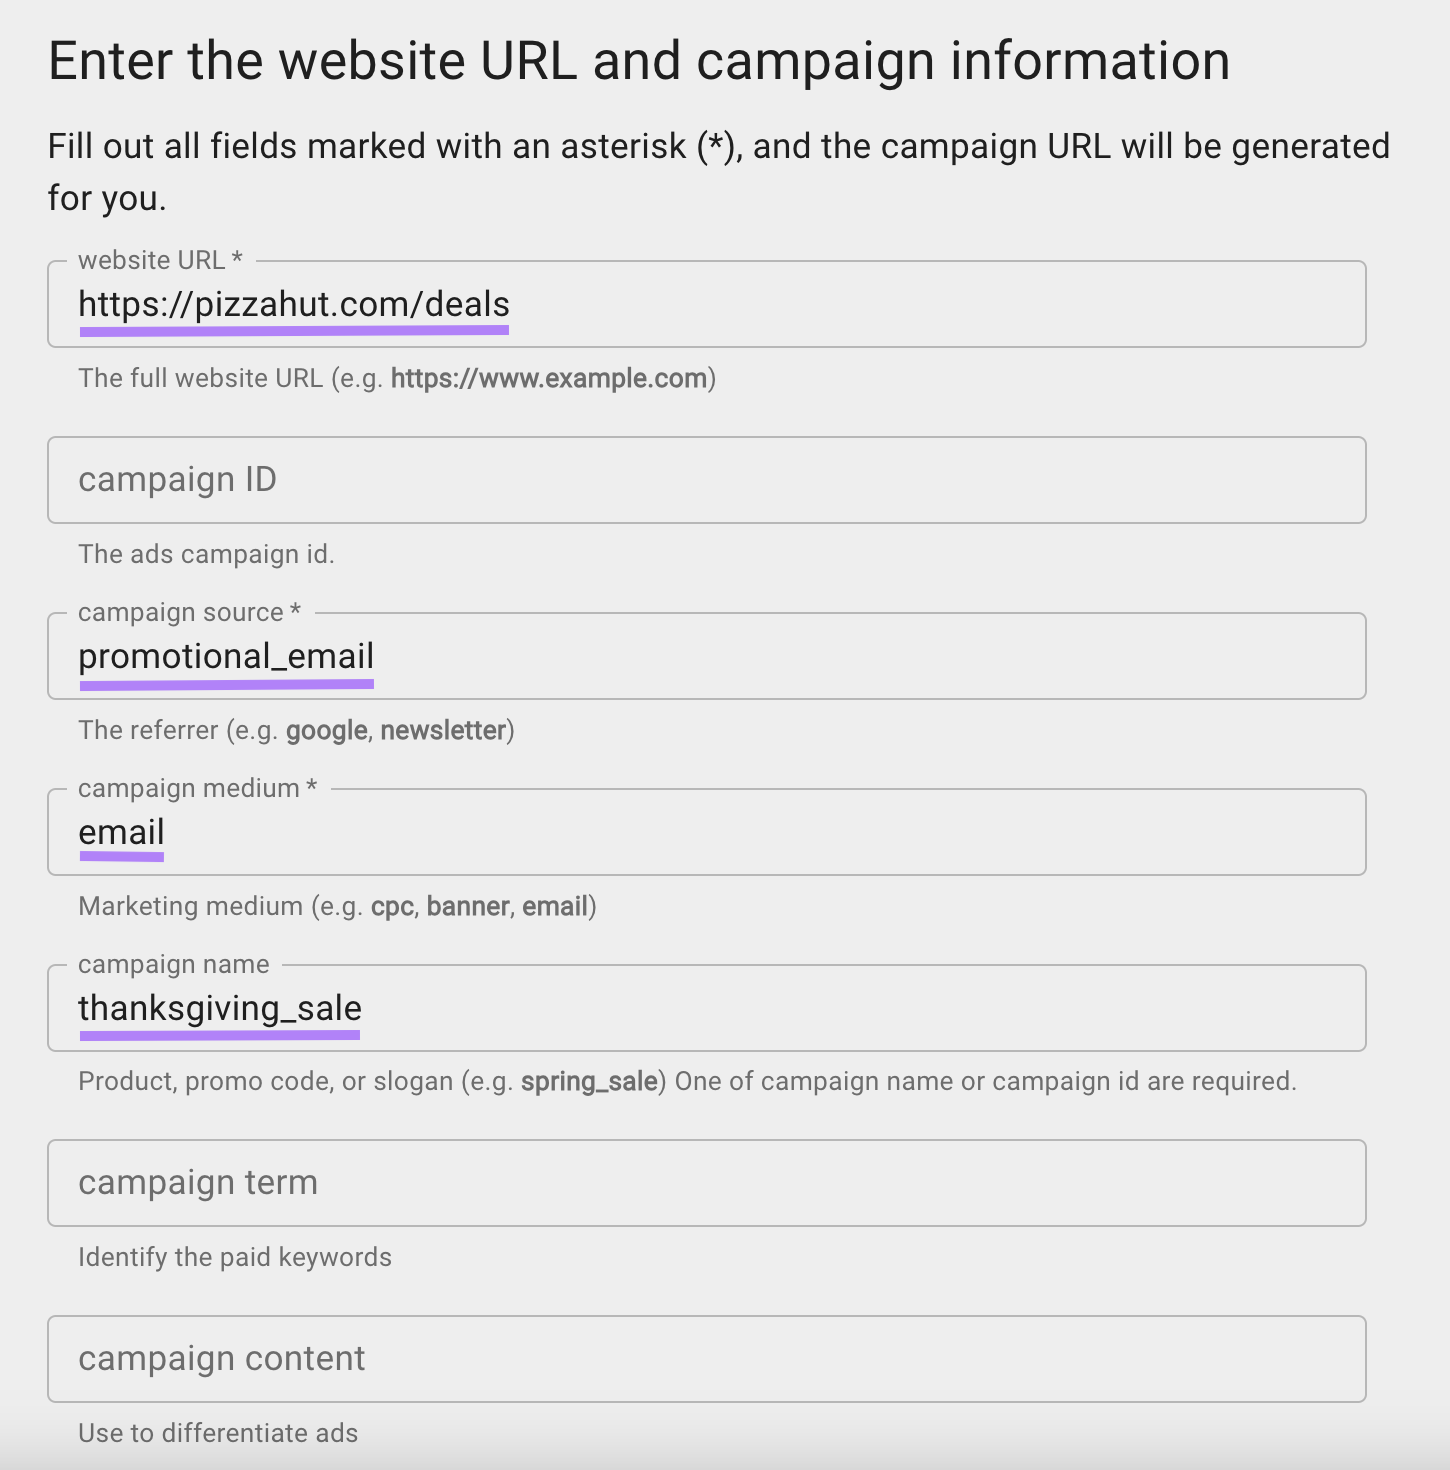
This is what your URL will look like with the selected UTM parameters. You can copy the URL with the copy icon directly to the right of the generated URL, and use it in your promotional email.
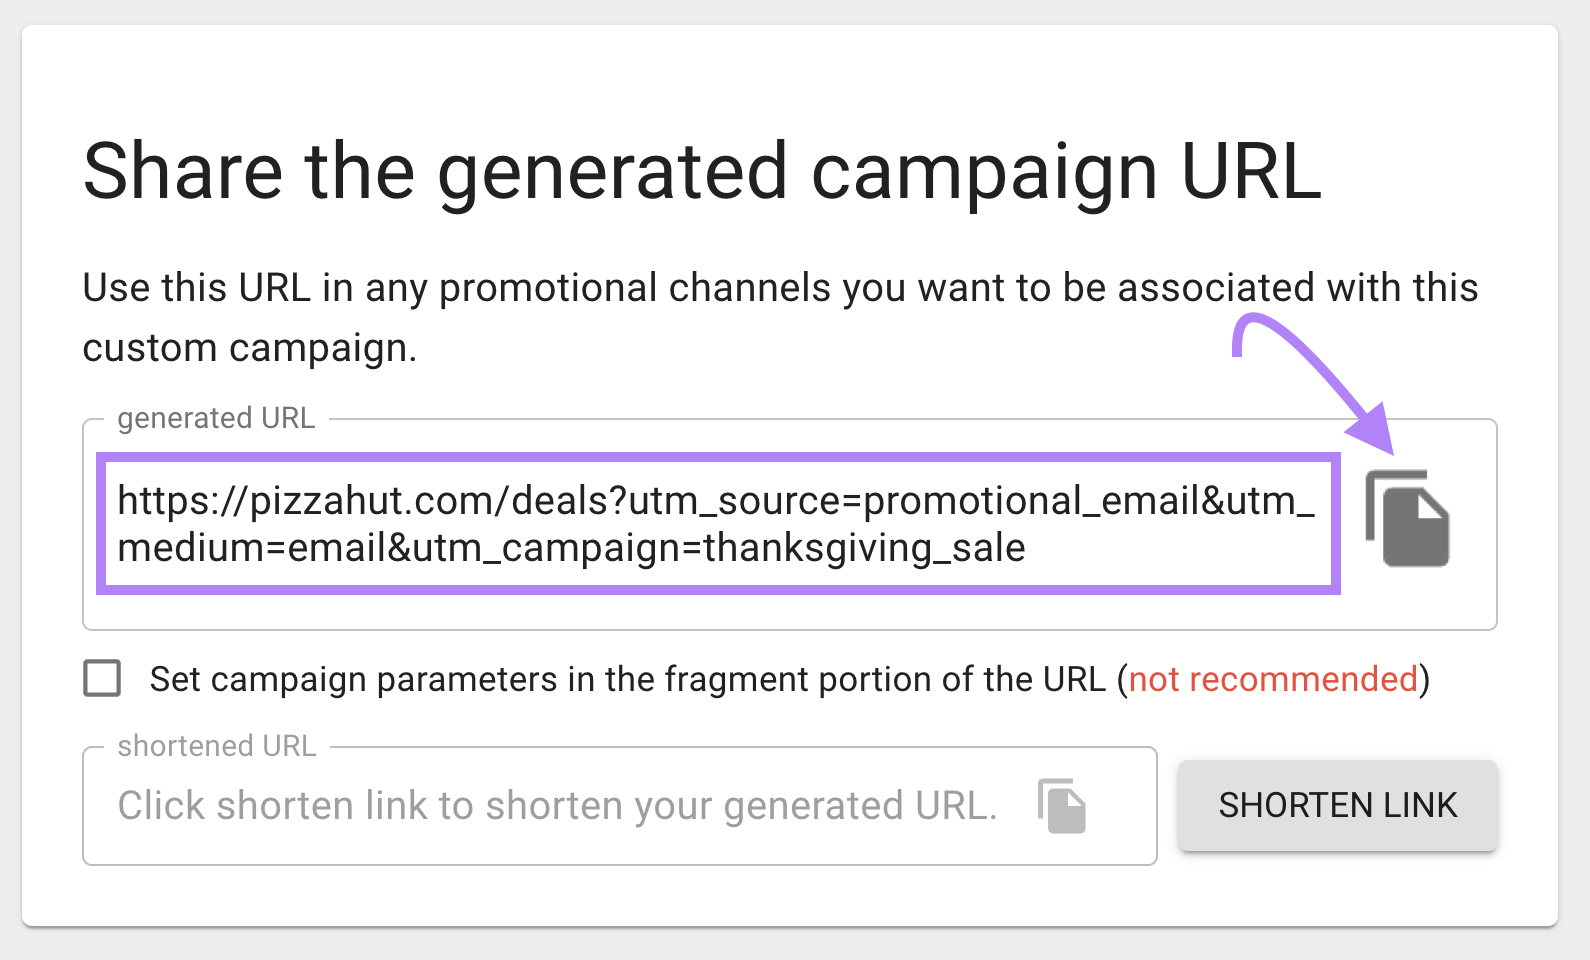

When your audience clicks the link, those UTM parameters will be passed to GA so you can analyze your email’s performance.
How to Track UTMs in Google Analytics
Each UTM parameter correlates to a dimension in GA4. A dimension is simply an attribute of GA data.
When you’re looking for your UTM codes in GA, look for the dimensions shown at right in the image below. These dimensions are known as “session-scoped” dimensions, which means they describe data at the session (visit) level. Session-scoped dimensions will always have the prefix “session” in their name.
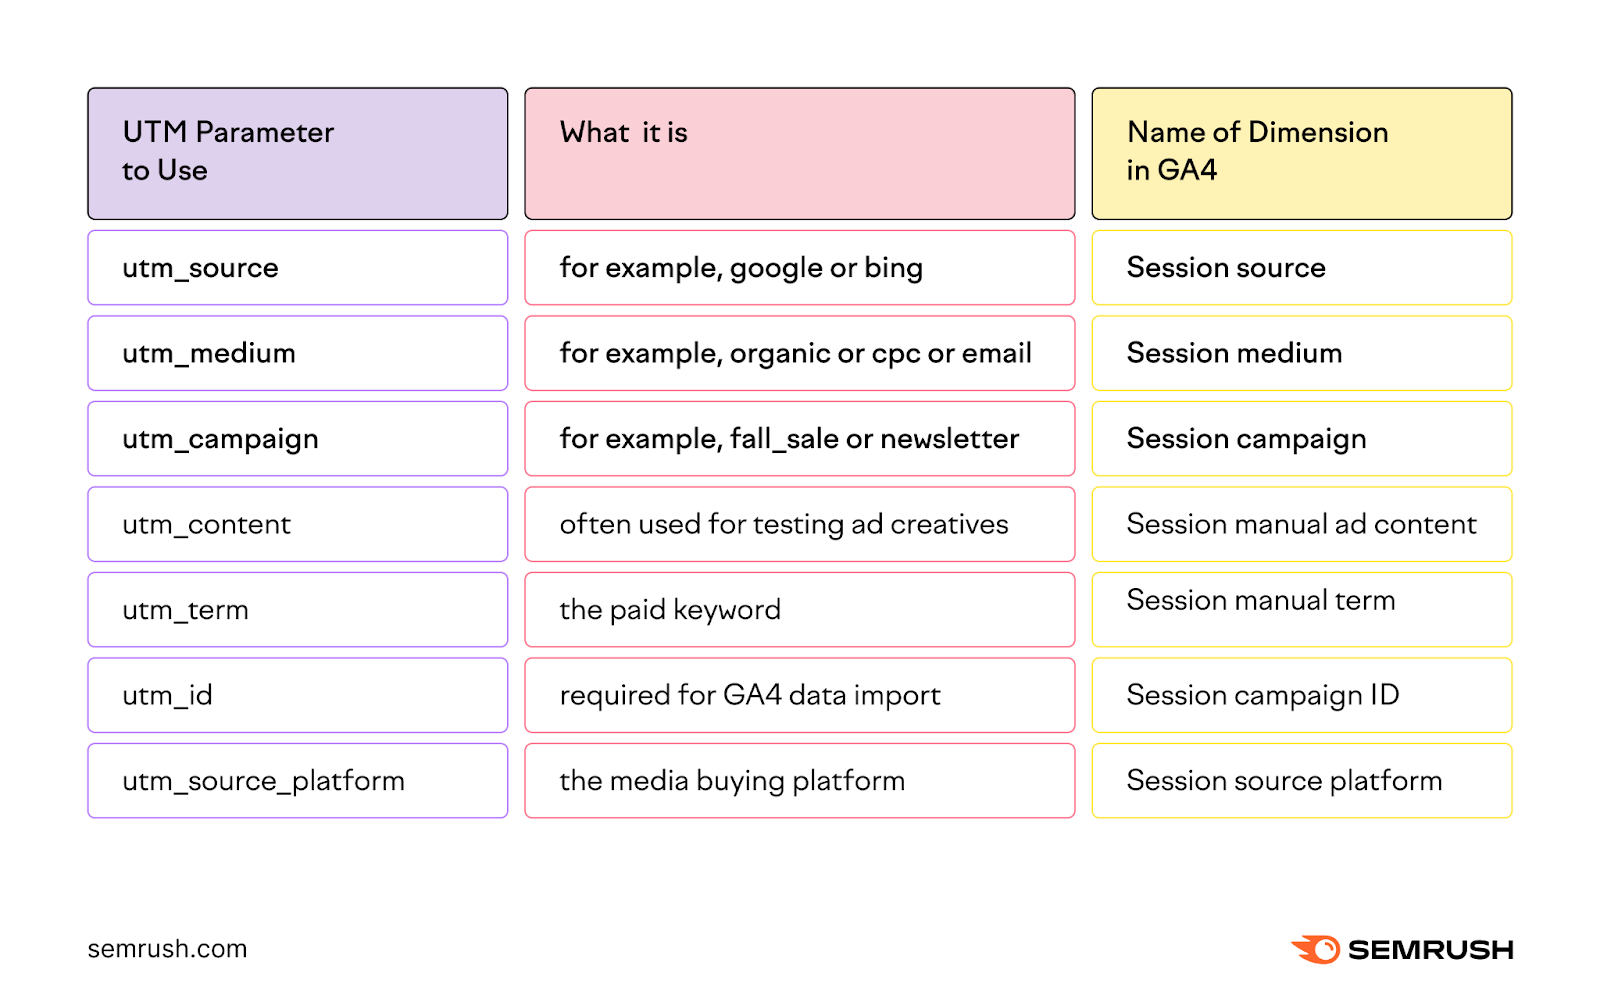
GA also has user-scoped dimensions showing the same UTM parameters as the session-scoped dimensions, though they’re less commonly used.
Unlike session-scoped dimensions, user-scoped dimensions only show UTM data from First user visits.
In other words, these user-scoped dimensions will always show the identifying UTM data from the first visit that a user made to your site. If a user came to your site through three different UTM-coded links, the First user dimensions will always show the UTM data from the first visit only.
This can be helpful if you want to focus your marketing campaign analysis on initial user acquisition. It’s also important to know because you can use user-scoped dimensions to test your UTM codes in GA4.
Testing UTM Codes in GA4
You can use GA4 to test your UTM codes, though there is a limitation.
At this time, only user-scoped dimensions are available in the Realtime report.
Hopefully, adding session-scoped dimensions to the Realtime report will be a future enhancement coming to GA4. For now, here’s how you can use the First user campaign dimension to test and see whether your UTM code is working properly.
First, if it’s not your first visit to the website, clear cookies from your browser. Clearing cookies will allow GA to see you as a new user so the first user dimensions will apply to your visit.
Here’s how to do that if you’re using Chrome.
Click the three dot icon in the top right corner of your browser and click “More tools.”
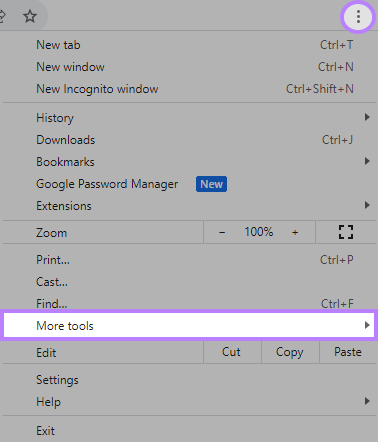
Then, click “Clear browsing data.”
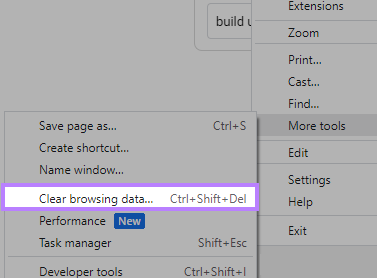
You’ll see a menu where you can choose which browsing data to delete. Select “Cookies and other site data” and click “Clear data.”
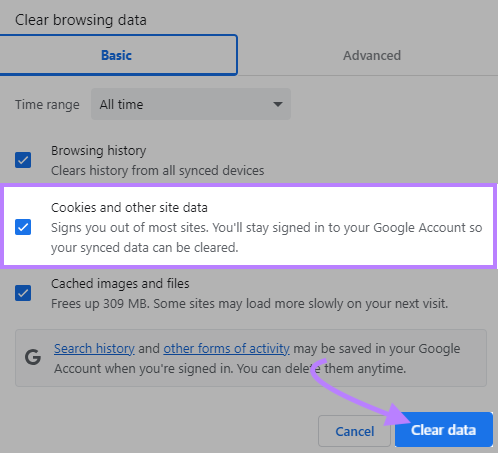
Now, paste the UTM-coded URL into your browser, and visit the page.
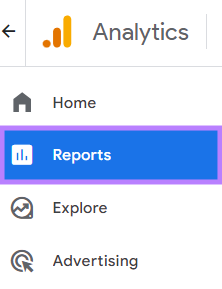
Next, open GA in another browser window and click “Reports.”
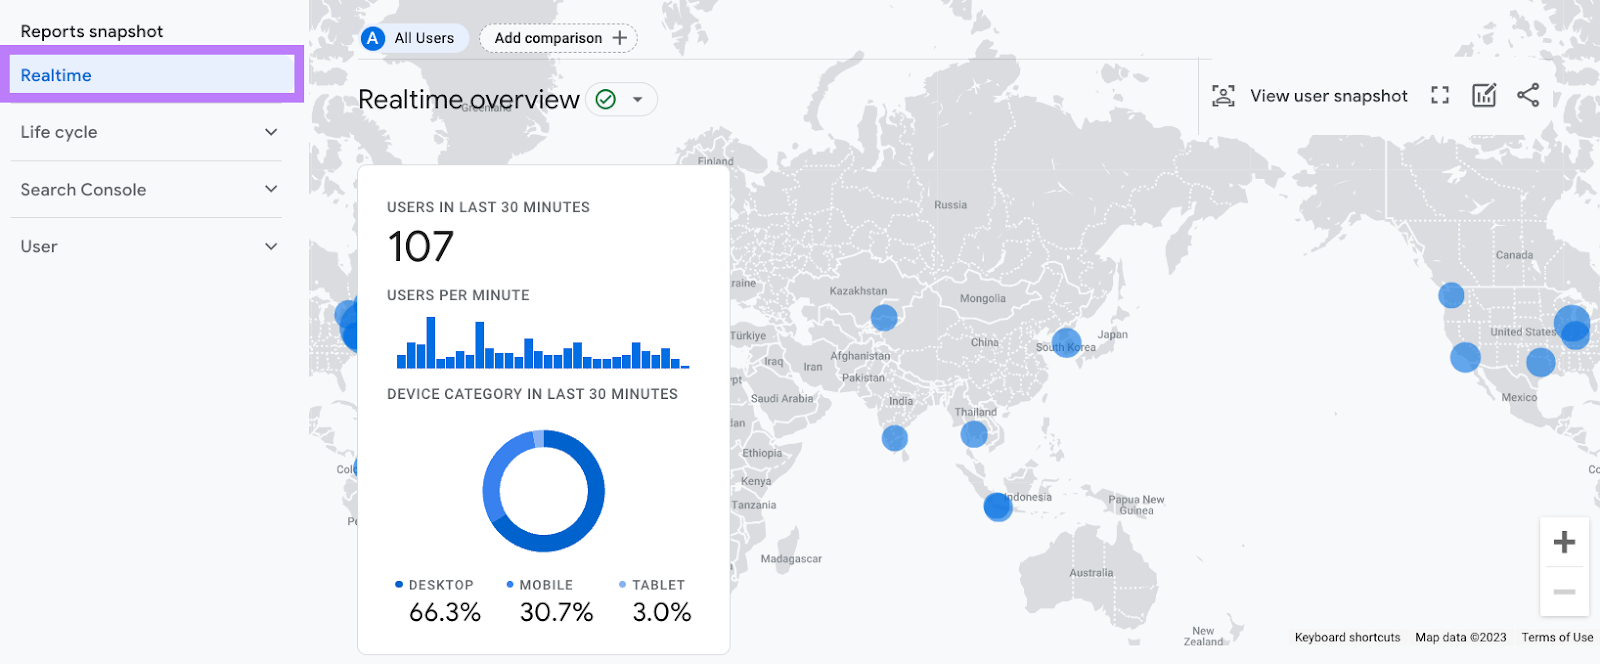
Now, click “Realtime.”
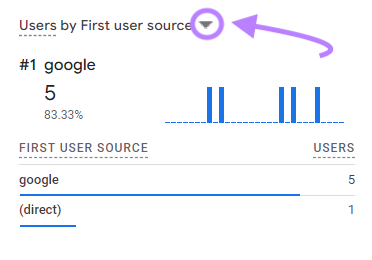
Look for the card (a subset of your data that shows a single dimension and metric) that shows “Users by First user source.” Click the drop-down arrow.
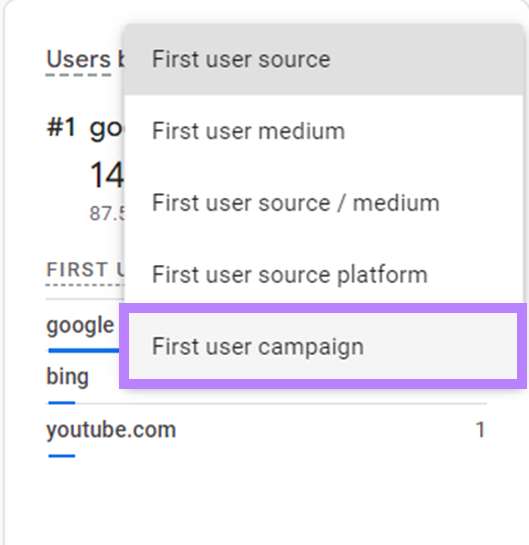
Change the dimension to “First user campaign.”
If you’ve set up your campaign parameter correctly, you should see your campaign name here. If you’re the only person testing, you should see a value of “1” in the Users column.
For example, if you used utm_campaign=thanksgiving_sale you should see this:
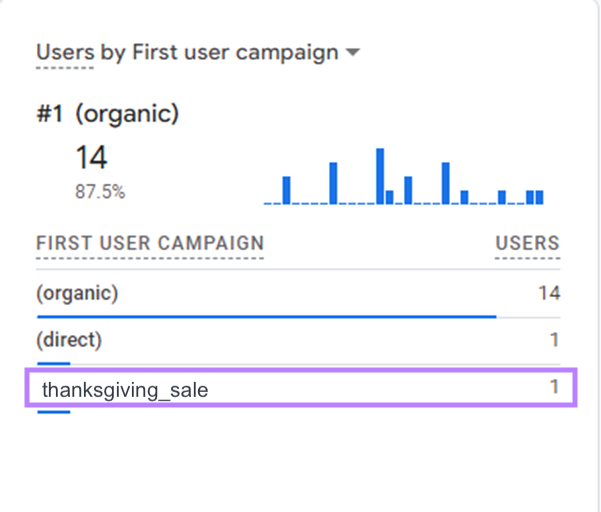
If you don’t see the name of your campaign after several minutes, double check the construction of your UTM-coded link in your browser.
Make sure that nothing was accidentally changed after copying it from the Campaign URL Builder tool. If you notice an error, start the test again by clearing cookies from your browser. Then paste the UTM-coded URL into your browser again and re-check in the Realtime report.
Don’t be too frustrated if you still are not seeing your UTM data after double checking your UTMs and testing again. You have likely run into the testing limitation, and you can still launch your campaign.
You’ll still be able to view your UTM data in GA after your campaign officially launches. The Realtime report notwithstanding, both session-scoped and user-scoped dimensions are available in GA4.
How to View and Analyze UTM Code Performance in GA4
The “Traffic acquisition” report is the best place to see your UTM-tagged traffic in GA4. Here’s how to do that.
After you’ve logged in to GA4, click “Reports.”

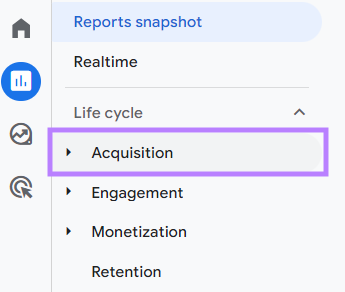
In the Life cycle menu, click “Acquisition.”
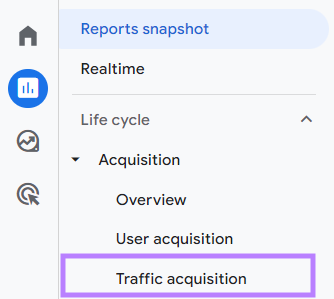
Then, click “Traffic acquisition.”
You’ll see a report that looks like this:
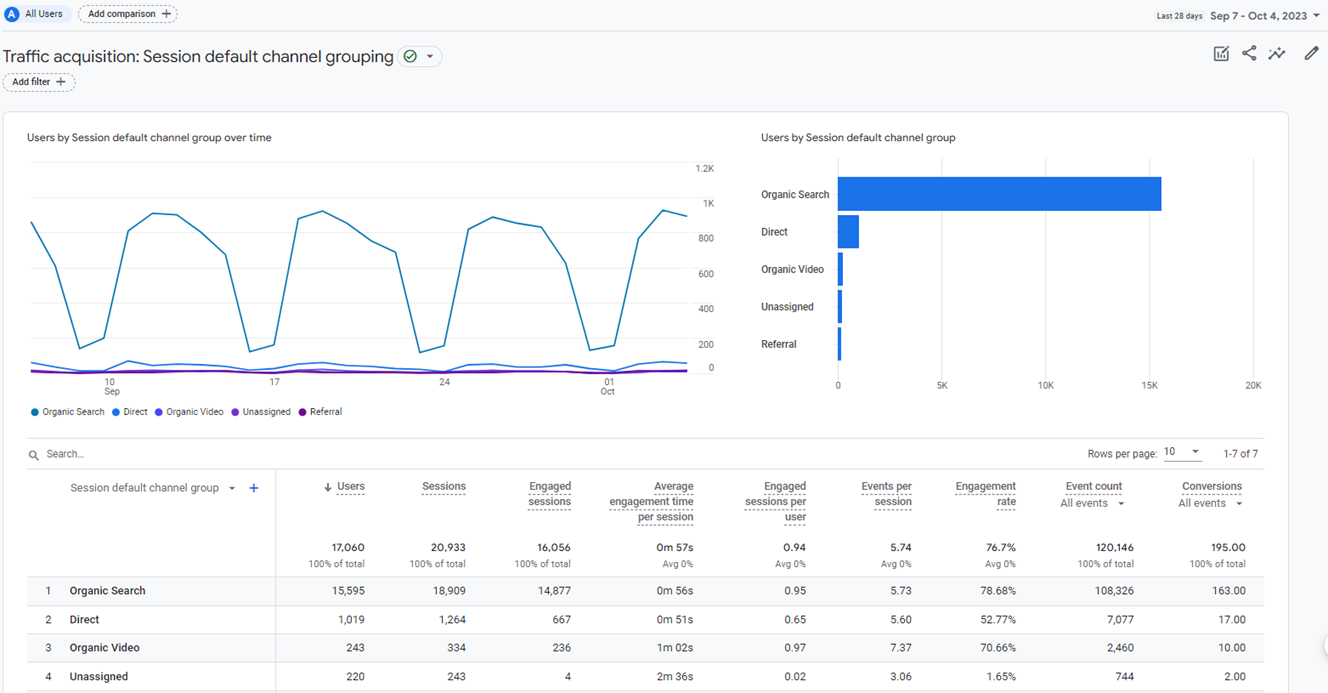
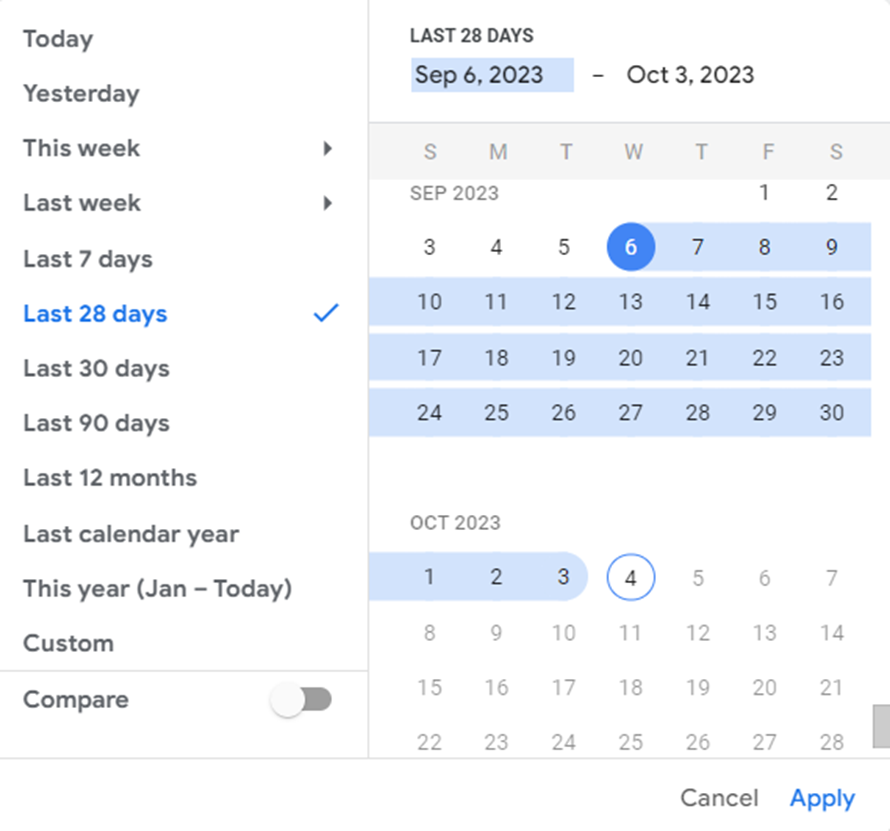
By default, you’ll see the last 28 days’ worth of data in your table. You can customize the date range by clicking the date field in the top right corner.
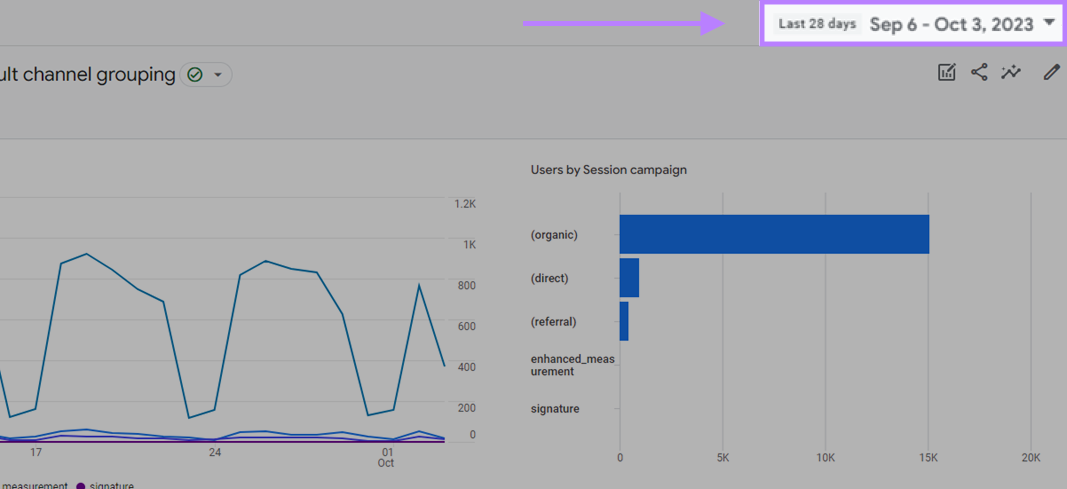
Use the date range selector to choose the time period you need.
Now, let’s adjust the primary dimension of your traffic data.
The “Traffic acquisition” report shows your site’s traffic grouped at the channel level, but you can change that by clicking the small black arrow as shown below.
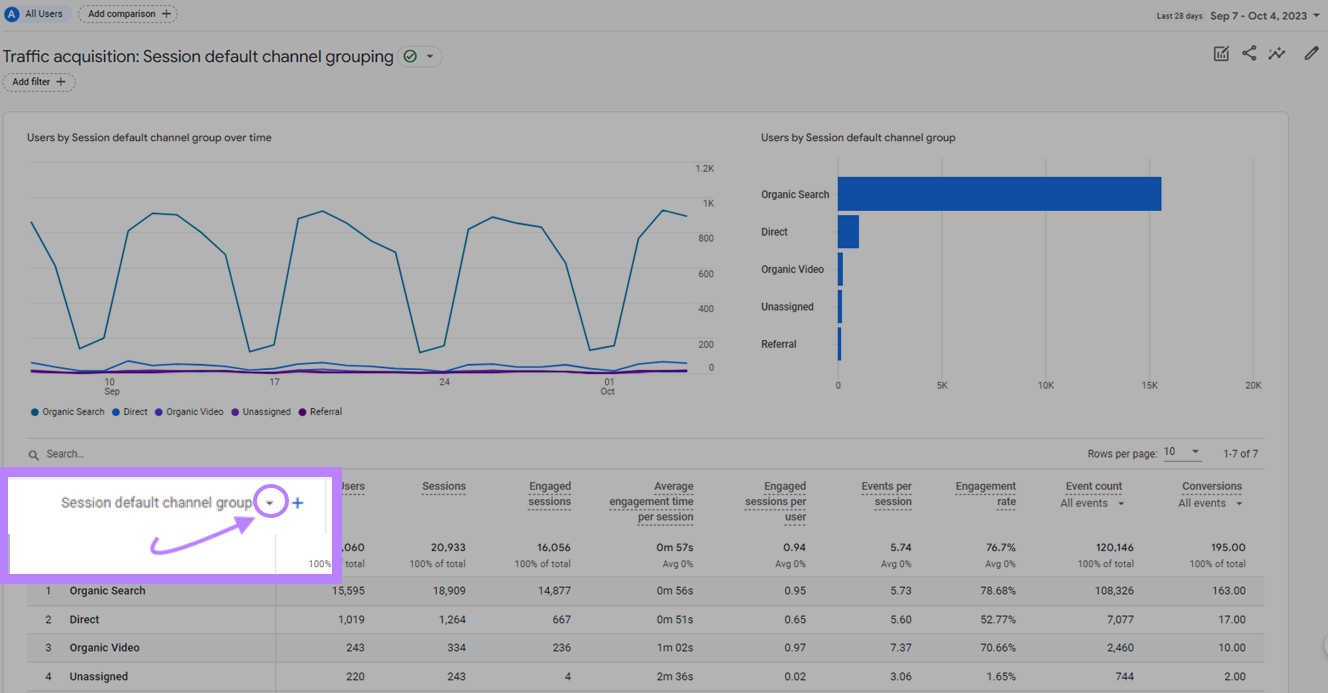
After you click the small black arrow next to “Session default channel grouping,” select “Session campaign” from the list of available dimensions.
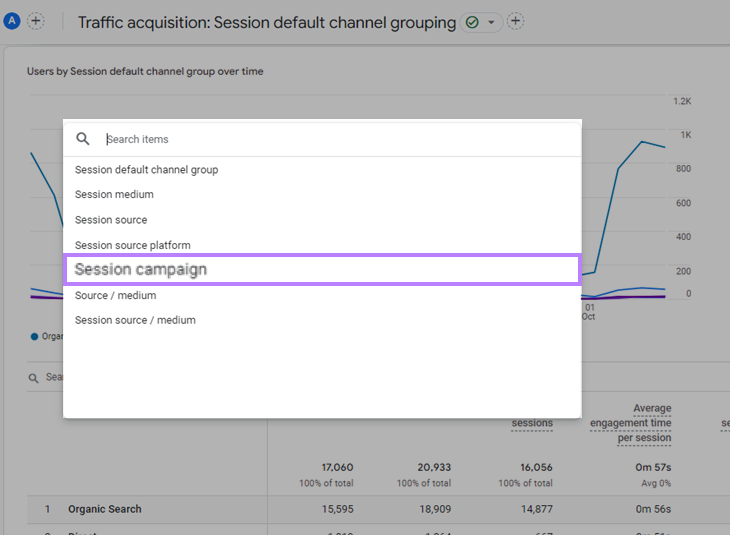
This will change the primary dimension to show all the traffic you’ve tagged using the utm_campaign parameter:
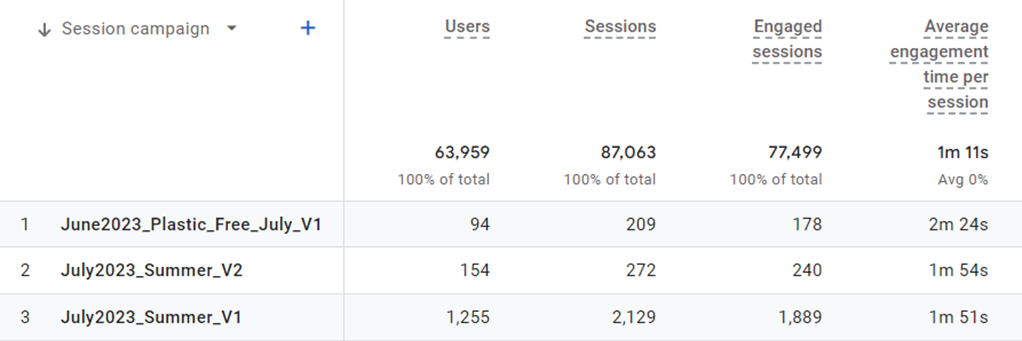
Now, click the blue “+” sign to the right of “Session campaign” to add a secondary dimension to your analysis.
You’ll be able to search for a secondary dimension to add to your campaign data. Begin typing “session source / medium” in the search field.
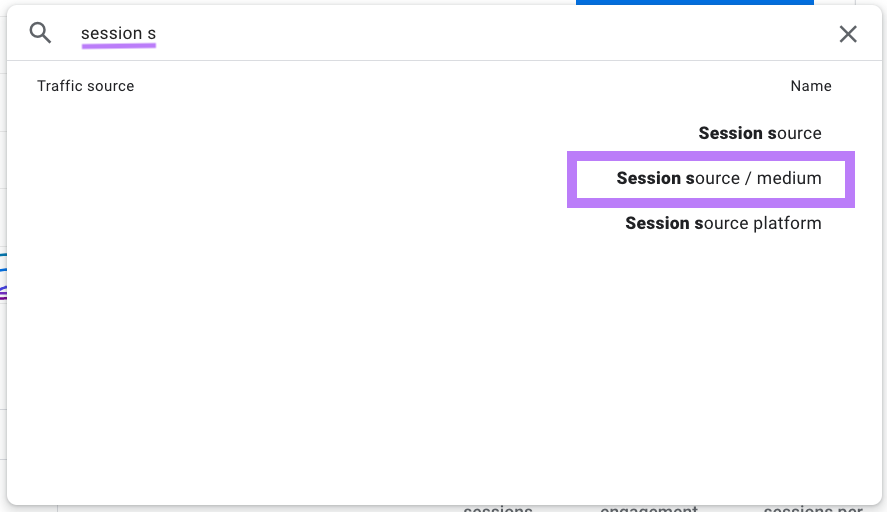
Click on “Session source / medium” to add the secondary dimension to your campaign report.
This will show the details of the utm_source and utm_medium parameters combined into one dimension.
Here’s what the report looks like now:

We’ll keep using this report below as we apply a filter for deeper analysis.
How to Filter UTM Data and Use It to Optimize Campaigns
You can use data from your UTM-tagged campaigns to improve your marketing results.
Let’s say you’re an email campaign manager for a clothing business. Your primary objective is to drive sales through email.
Here’s how you can work with your UTM data through filtering and analysis to track the performance of those efforts.
Let’s start by applying a filter to isolate email traffic.
Apply a Filter for UTM Data in Google Analytics
Once you’ve generated a report following the instructions in the previous section, apply a filter by clicking “Add filter” at the top left of the report.
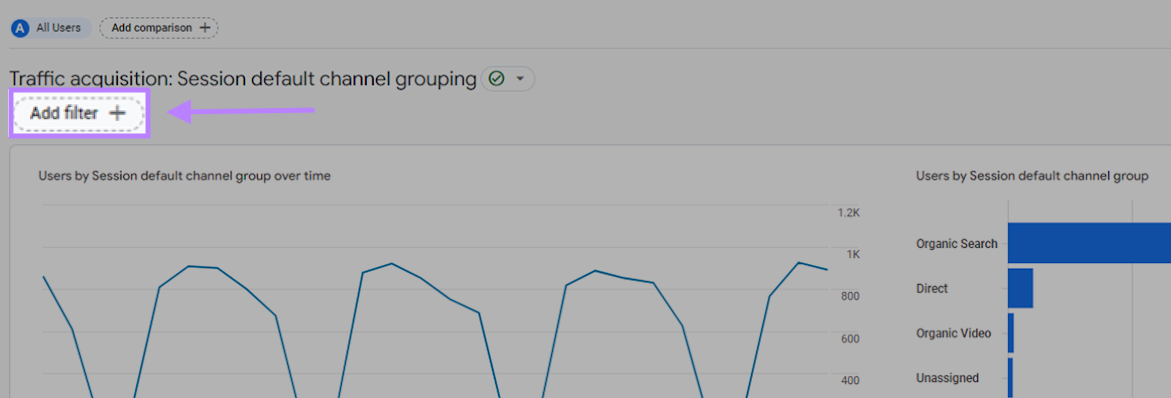
On the right side of your screen, you can now create your filter conditions.
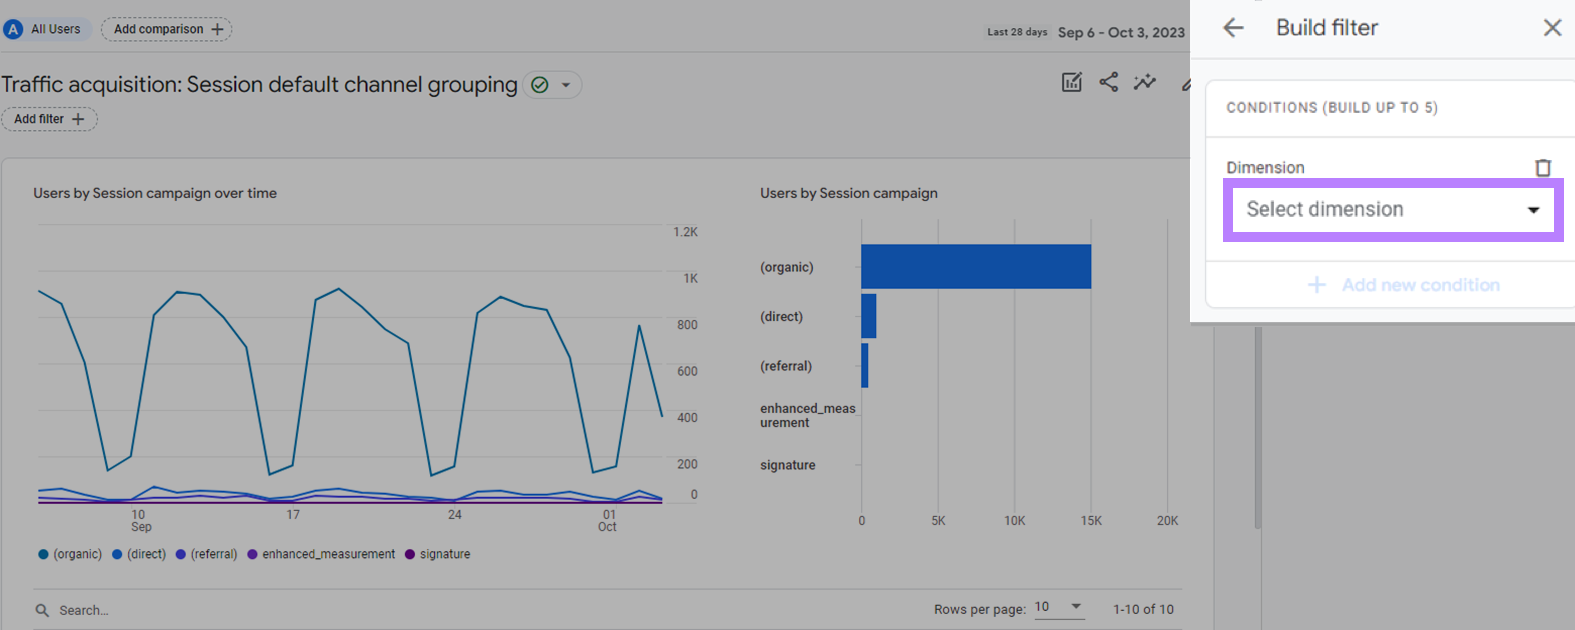
Begin typing “session medium” in the Dimension field. Then click “Session medium” once you see it.
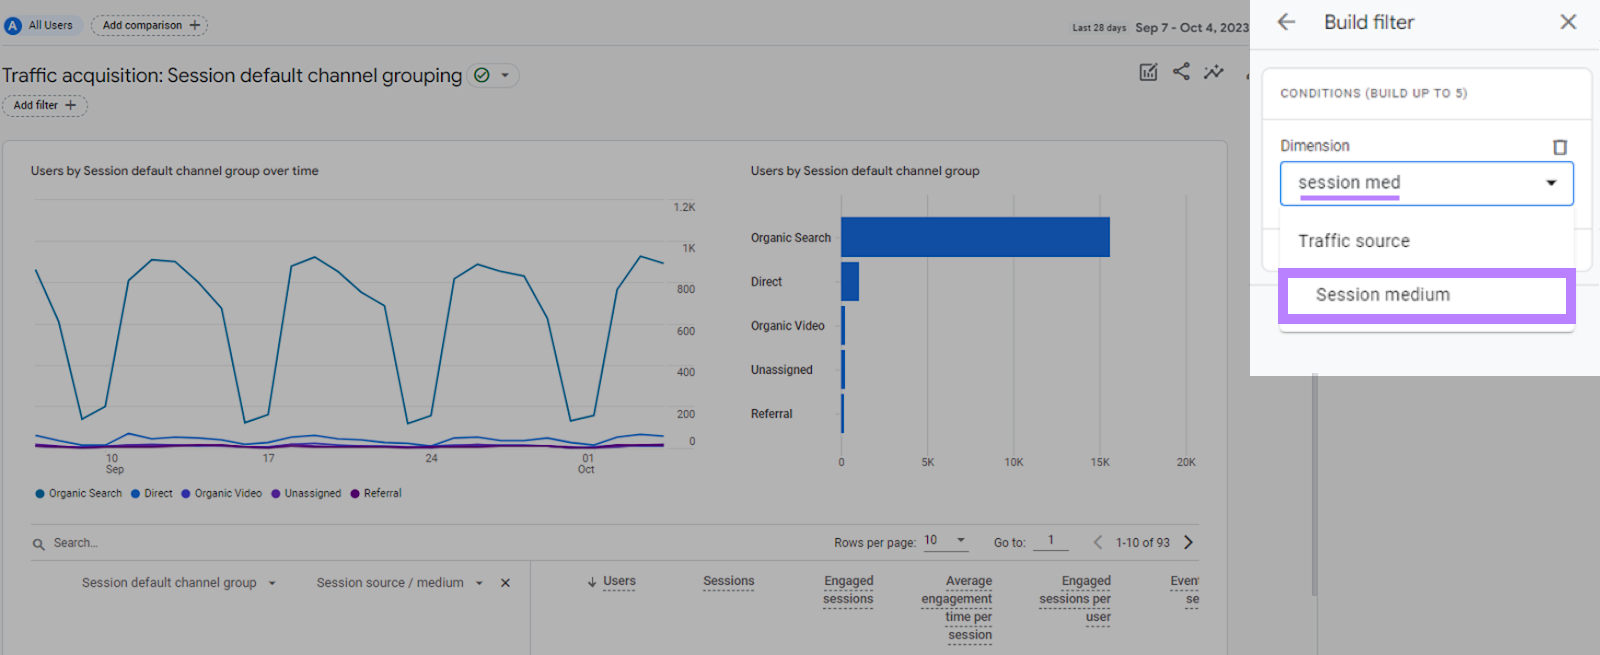
To create a filter to view your email traffic, select “exactly matches” below the “Match Type” drop-down menu.
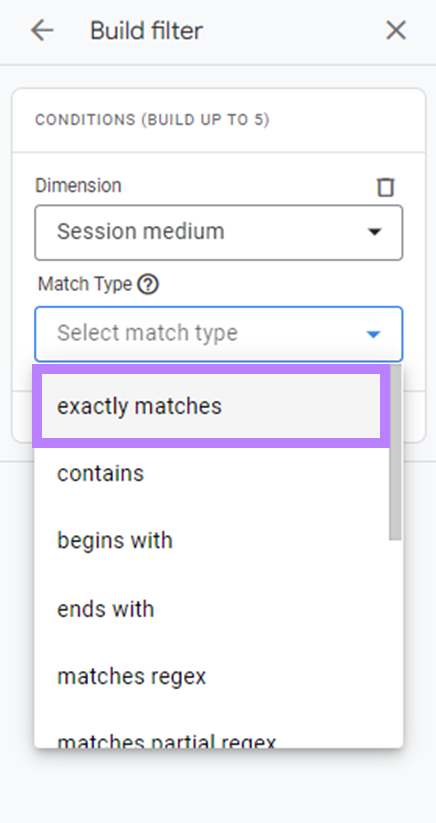
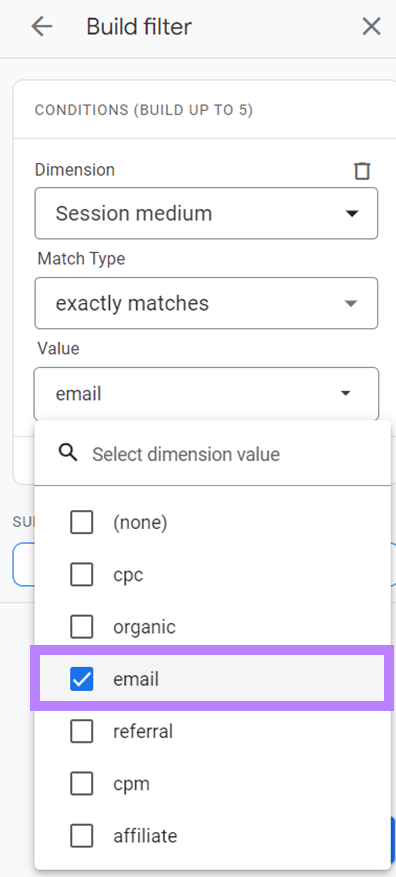
Then, click into the field below the “Value” menu to see all of your available options that match the Session medium dimension.
Choose “email”:
Click the “Apply” button that appears below your filter.
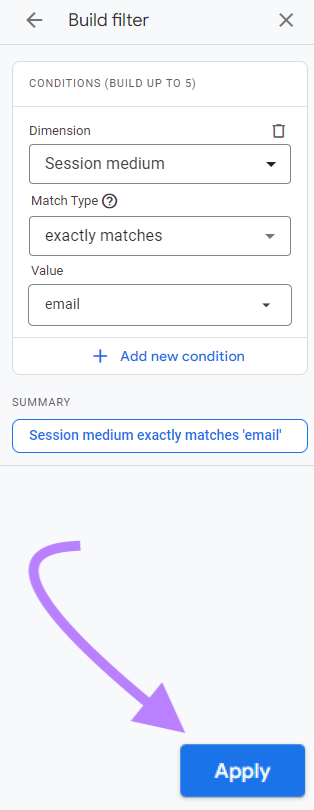
You now have a filtered report of only your email traffic. You should also still have a secondary dimension applied for Session source / medium.
Click the drop-down arrow to the right of that secondary dimension so you can analyze the utm_content parameter instead.

Search for “Session manual ad content” in the search area that appears after you click the down arrow. Select that dimension once it appears.
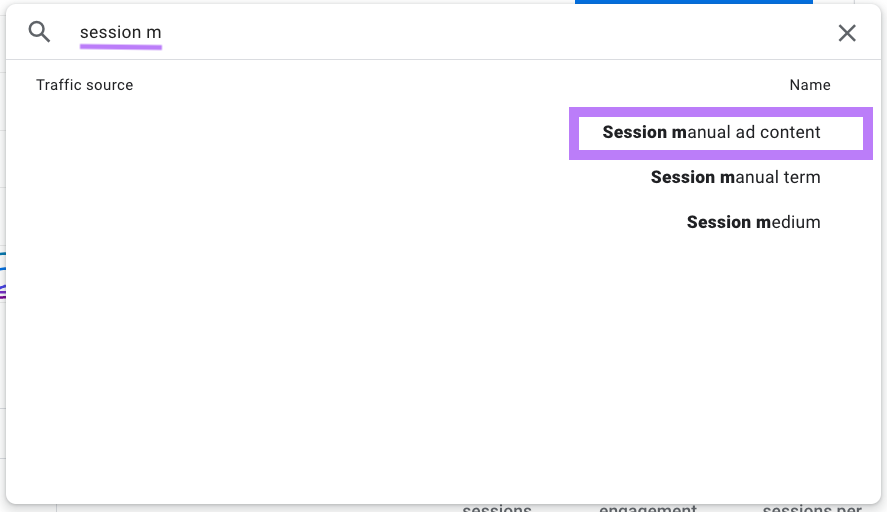
You’ll now see your Session campaign data with Session manual ad content (utm_content parameter) as the secondary dimension.
The Session campaign dimension identifies the specific email, and the Session manual ad content identifies the specific link within the email. In this case, it was a button labeled “Shop Now.”

You have the UTM data you need. Now, let’s see how you can optimize your campaigns with it.
How to Optimize Campaigns with Filtered UTM Data
Here are two ways you can improve your performance with the help of your UTMs. In this example, you want to maximize revenue since that’s your primary objective as email campaign manager.
Prioritize Featured Items Based on Revenue
In the filtered report, you see that the email about a hoodie (row 5) drove about $1,354 in sales, which is roughly 11.2% of the total revenue coming from these email link clicks.

You can also see that this same item only drove 6.6% of the engaged sessions (142 / 2144). You’re not surprised because the item didn’t have prominent placement in the email.
You may decide to test a more prominent placement for this item to see whether it could lift sales.
Refine Your A/B Testing
Say you run an A/B test in an email campaign. The primary version (“V1”) has multiple calls to action (CTAs), including small “Buy Now” buttons next to key items, and a large “Shop Now” button for shopping the entire online store.
The test version (“V2”) includes the “Shop Now” button and the product images, but no “Buy Now” buttons next to those products. Your hypothesis is that the single CTA in V2 might lead to a simpler user experience and more sales coming from the “Shop Now” button.
You see the data you need in rows 2 (V2) and 8 (V1) in the table below.

You notice that V2 produced a slightly higher average engagement time per session, (2m 12s vs. 2m 03s), and a higher engagement rate (88.72% vs. 88.44%) than V1.
Since you’re focused on driving revenue, you want to know how much revenue each engaged session generated. To get this amount, you’ll divide the total revenue by the number of engaged sessions.
V1: $7,769.48 / 1,132 = $6.86 per engaged session
V2: 709.8 / 173 = $4.10 per engaged session
So, the revenue per engaged session from V1 was 67% higher than the revenue per engaged session in V2.
Now you can continue the campaign using V1.
Creating Effective UTM Parameters for Accurate Tracking
To successfully and accurately track your campaigns, you must keep your data clean and orderly.
Stick to these guidelines, and your UTM data will remain consistent and easier to track.
- Establish and share naming conventions for your UTM parameters
- Appoint a primary campaign manager in your organization. This person can answer any questions about your organization’s naming conventions and can communicate changes to other stakeholders.
- Keep track of the UTM codes you use in a shared spreadsheet. Google Sheets works well for this. Whenever someone in your organization creates a UTM code, they can enter it in the spreadsheet to ensure the naming conventions are followed, and that codes aren’t duplicated.
- Stick with lowercase letters for your UTM codes. Remember, it helps keep things simple because UTMs are case-sensitive.
- Keep your UTM codes short but descriptive. You need enough information to be able to identify what the UTM code is telling you. But you don’t need proper grammar or syntax.
- If you’re using UTM-tagged links in a place where the entire URL is visible, consider using a URL shortener
Using UTM Parameters Across Different Marketing Channels
UTM codes are ideal for tracking multi-channel marketing efforts. But you must have a plan so you know what your data is telling you.
Let’s take a look at a hypothetical marketing campaign for a brand-new product launch supported by two primary channels: email and social media. All channels are driving traffic to your new landing page: www.wizbang.com/newproductlaunch/.
This is how you might use UTM codes.
Email Tracking
You want to notify your entire email database about the launch, so you’ll use your monthly newsletter to do this.
Here’s what the URL might look like.

If your email marketing team wants to test two different creative versions in the email, you might add the utm_content parameter so you could test version A against version B. Like this for version A:

Social Media Tracking
Your customer base is most active on Instagram, and your social team is investing all of their paid budget in the platform. You create a campaign tracking URL for them to use in their ads. It looks like this:
Let’s imagine your social team knows which specific ad formats work best for your audience. They’ve decided to focus on buying Instagram Carousel ads. You add the utm_content parameter so you can track performance. It looks like this:
Now, you can use the utm_campaign parameter to measure the overall success of the campaign, while utm_source will help you measure email and social media independently. And the utm_content parameter will provide insight about your creative and ad format testing.
Learn more about creating and using UTM codes for social in our guide: How to Use Semrush Social for Every Platform.
Harness UTM Codes for Data-Driven Marketing Success
With the additional insight coming from your UTM codes, you’ll have more actionable data at your fingertips.
You can conduct deeper analysis for tactics like A/B testing and ad buying. You can also generate insights for reporting and future planning by aggregating campaign performance across multiple channels.
And you can boost your overall marketing performance further by using a tool suite like Semrush.
Just as UTMs can consolidate your marketing campaign data, Semrush draws data from multiple sources and assembles it in one place. You can then use those insights to take your marketing to new heights.

![What Is a Markup Language? [+ 7 Examples] What Is a Markup Language? [+ 7 Examples]](https://static.semrush.com/blog/uploads/media/82/c8/82c85ebca40c95d539cf4b766c9b98f8/markup-language-sm.png)


