What Is an HTML Hide Element?
An HTML hidden attribute indicates the element is not yet or no longer relevant. If you mark an element as “hidden,” you’re telling browsers not to display it to users. Even if they’re using screen readers.
The hidden attribute looks like this:
<p hidden>This text should be hidden.</p>
<p>This text should not be hidden.</p>
In the above example, the browser will not display the first line of text. But it would display the second line.
The HTML hide attribute allows developers to control the visibility of elements on a page. This can help streamline the user experience by preventing irrelevant content from cluttering the webpage until that content becomes relevant. Or until a user interacts with specific parts of the page.
For example, if the user clicks a button or drop-down menu toggle. This action could trigger JavaScript code to remove the hidden attribute and reveal the content.
How to Use the HTML Hidden Attribute
You can apply the HTML hide element within the HTML markup of a component to make it invisible on the webpage.
To do this, add “hidden” to the element you want to hide. Here’s how that might look for a heading and a paragraph you want to hide:
<div hidden>
<h1>This Heading Is Hidden</h1>
<p>This text is also hidden</p>
</div>
This attribute works across major browsers, including Chrome, Edge, Firefox, and Safari.
How the HTML Hide Attribute Works
The HTML hide attribute makes any webpage element invisible to users without removing it from the HTML document. Letting you control the visibility of content on a page.
Adding the hidden attribute to an element causes the browser to apply the following CSS property:
display: none;
The page renders as if the element does not exist, making the element invisible to the viewer.
However, the element still exists in the DOM (Document Object Model), meaning you can access and manipulate it using JavaScript.
Let’s say you have a webpage with a “Read More” button. You can mark the detailed content section with the hidden attribute to make it invisible.
Then, when the user clicks the “Read More” button, a JavaScript function could remove the hidden attribute from the detailed content section, making it visible and accessible to the user.
Why Would You Want to Hide an HTML Element?
Learning how to hide HTML elements allows you to:
- Declutter interfaces
- Prioritize content
- Create a responsive design
Hidden elements allow you to minimize distractions on a page to present only the most crucial information to your users. For example, you can hide advanced settings or additional information behind clickable links or buttons.
This gives users the ability to choose whether they want to learn more, without leaving the page. Like this section of the Semrush homepage that allows users to select different aspects of the tool suite to learn more:

You can also draw attention to crucial information or actions you want users to take by hiding less important elements. Such as prominently showing a sign-up button while hiding detailed FAQs under drop-down toggles.
To put the focus on your calls to action (CTAs). Users can still learn more by clicking the drop-downs.
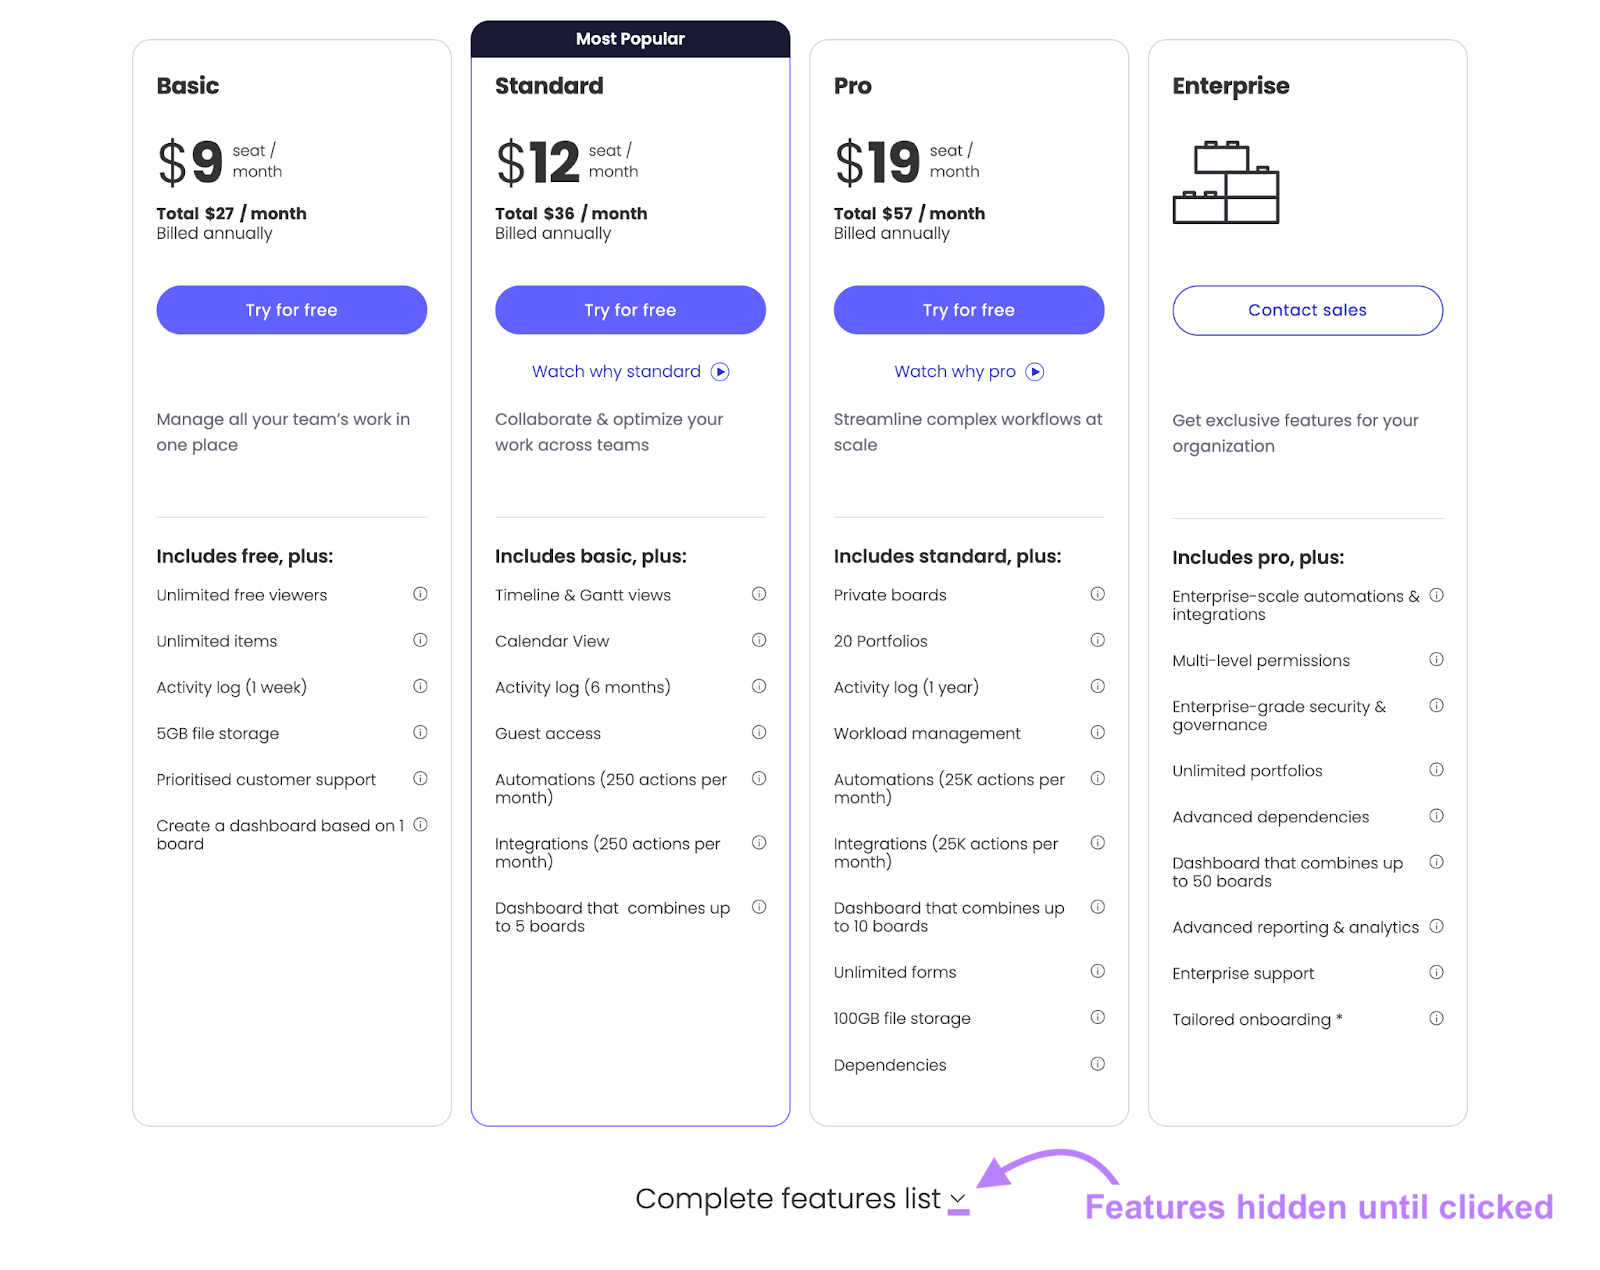
You can also hide HTML elements that may appear on desktop but could create a messy experience on mobile. Such as sidebars or extra menus.
The HTML hide attribute is a simple, semantic way to indicate that a browser should not display an element. But other techniques may offer more control when hiding elements and how they affect the webpage’s layout and visibility.
Other Techniques for Hiding Elements in Web Design
Different techniques for hiding elements in web design include using CSS and JavaScript. Each approach offers unique advantages that fit specific use cases.
Choosing between these methods depends on your preferences, including how elements should interact with the layout, whether accessibility is a concern, and if you require animations.
Using CSS Display
You can use the “display” property with the value “none” to hide elements using CSS. This method removes the element from the document flow, meaning it will not take up space and will be invisible to users.
There are two methods to use CSS display. The first is via inline CSS, where you add a “style” attribute with “display: none;” in your HTML element.
For example:
<p style="display: none;">This text is hidden.</p>
The second method is with external or internal CSS. In your CSS file or <style> tag, target the element you want to hide using a class, id, or any selector, and set “display: none;” for that selector.
For example:
.hidden-text {
 display: none;
}
Then, in your HTML, use the class “hidden-text” for any element you want to hide:
<p class="hidden-text">This text is hidden.</p>
When you set an element to “display: none;” you remove the space it would normally occupy, and other elements may shift to fill the gap.
Elements with the “display: none;” property don’t appear for screen readers and other assistive technologies. So, the content is inaccessible to users relying on these technologies. Consider the effects of using this property to ensure you’re not hiding content that should be accessible to all users.
Visibility: Hidden and Opacity
The “visibility: hidden;” property holds the element in the document flow (taking up space) but makes it invisible. And users are unable to interact with it.
However, the “opacity: 0;” property makes an element fully transparent but still interactive, and it still takes up space.
Here’s an example of CSS code with both visibility and opacity properties:
.hidden-visibility {
visibility: hidden;
}
.transparent-opacity {
opacity: 0;
}
Both elements are invisible to users. Users can’t interact with the .hidden-visibility element, but they can interact with the .transparent-opacity element.
For web design, “visibility: hidden;” is ideal for maintaining the layout structure while hiding elements, because it preserves the element’s space.
You might use the “opacity: 0;” property when creating a smooth transition to invisibility.
You can hide elements with “opacity: 0;” for design creativity, but this may confuse users if you don’t implement it carefully. For example, users could accidentally click a fully transparent button and go to a page they didn’t mean to.
Search engines may also consider using “opacity: 0;” for hiding content as a spam practice, especially if it’s an attempt to manipulate rankings. This could negatively impact your website’s rankings or result in penalties, like the search engine removing your webpage from search results entirely.
Further reading: How To Identify and Fix a Google Penalty
JavaScript Techniques for Dynamic Content Hiding
JavaScript offers a flexible way to display elements as needed. Allowing you to display webpage content based on user interactions or specific conditions.
JavaScript manipulates HTML elements by changing their styles or attributes. For hiding elements, you can adjust the display style property to “none” to hide an element and set it back to “block” or “inline” (depending on the element’s default display value) to show it.
Some use cases for dynamic hiding or revealing include:
- User interactions: Such as clicking a button, hovering over an element or submitting a form. For example, hiding a form after submission to show a success message.
- Page load conditions: Set elements to appear or disappear based on situations when the page loads. Like the time of day or the user’s location.
- Responses to data: Change content visibility in response to showing loading animations while waiting for data. You can then hide them once data appears.
Hiding Content for Browsers but Not Screen Readers
In most standard cases, the content you show to users on browsers should be available to those using devices like screen readers. This is typically a website accessibility best practice.
But if you want to hide content for browsers but not for screen readers, one option is to position the content off-screen. You should not do this for any navigable elements, like links.
To do this, first create a CSS class like so:
.sr-only {
position:absolute;
left:-10000px;
top:auto;
width:1px;
height:1px;
overflow:hidden;
}
You can name the “.sr-only” class something else if need be.
You’ll use this to position the HTML element you want to hide off-screen, like this:
<div class="sr-only">This text is hidden off-screen.</div>
Screen readers will read this as though it’s still part of the page’s content. However, it’ll be positioned far off to the left of the screen, so sighted users won’t see it in their browsers.
The Risks of Hiding HTML Elements
Hiding elements on your website incorrectly could negatively impact your visibility in search results.
Search engines may see hidden content as an attempt to manipulate search results by hiding content from users but presenting it to search engines.
Placing large amounts of keyword-stuffed text off-screen or using CSS to make text the same color as the background were techniques spammers employed in the early days of Google.
But now search engines can see these practices as attempts to manipulate rankings, potentially resulting in penalties.
So, be careful when hiding HTML elements. Plus, using code incorrectly when attempting to hide elements could lead to technical issues with your website.
Address Technical SEO Issues with Site Audit
Regular site audits can help you identify and resolve SEO issues. Including those that could arise if you make mistakes when trying to hide HTML elements.
Semrush’s Site Audit tool helps spot issues with your website’s SEO and provides recommendations on how to resolve them.
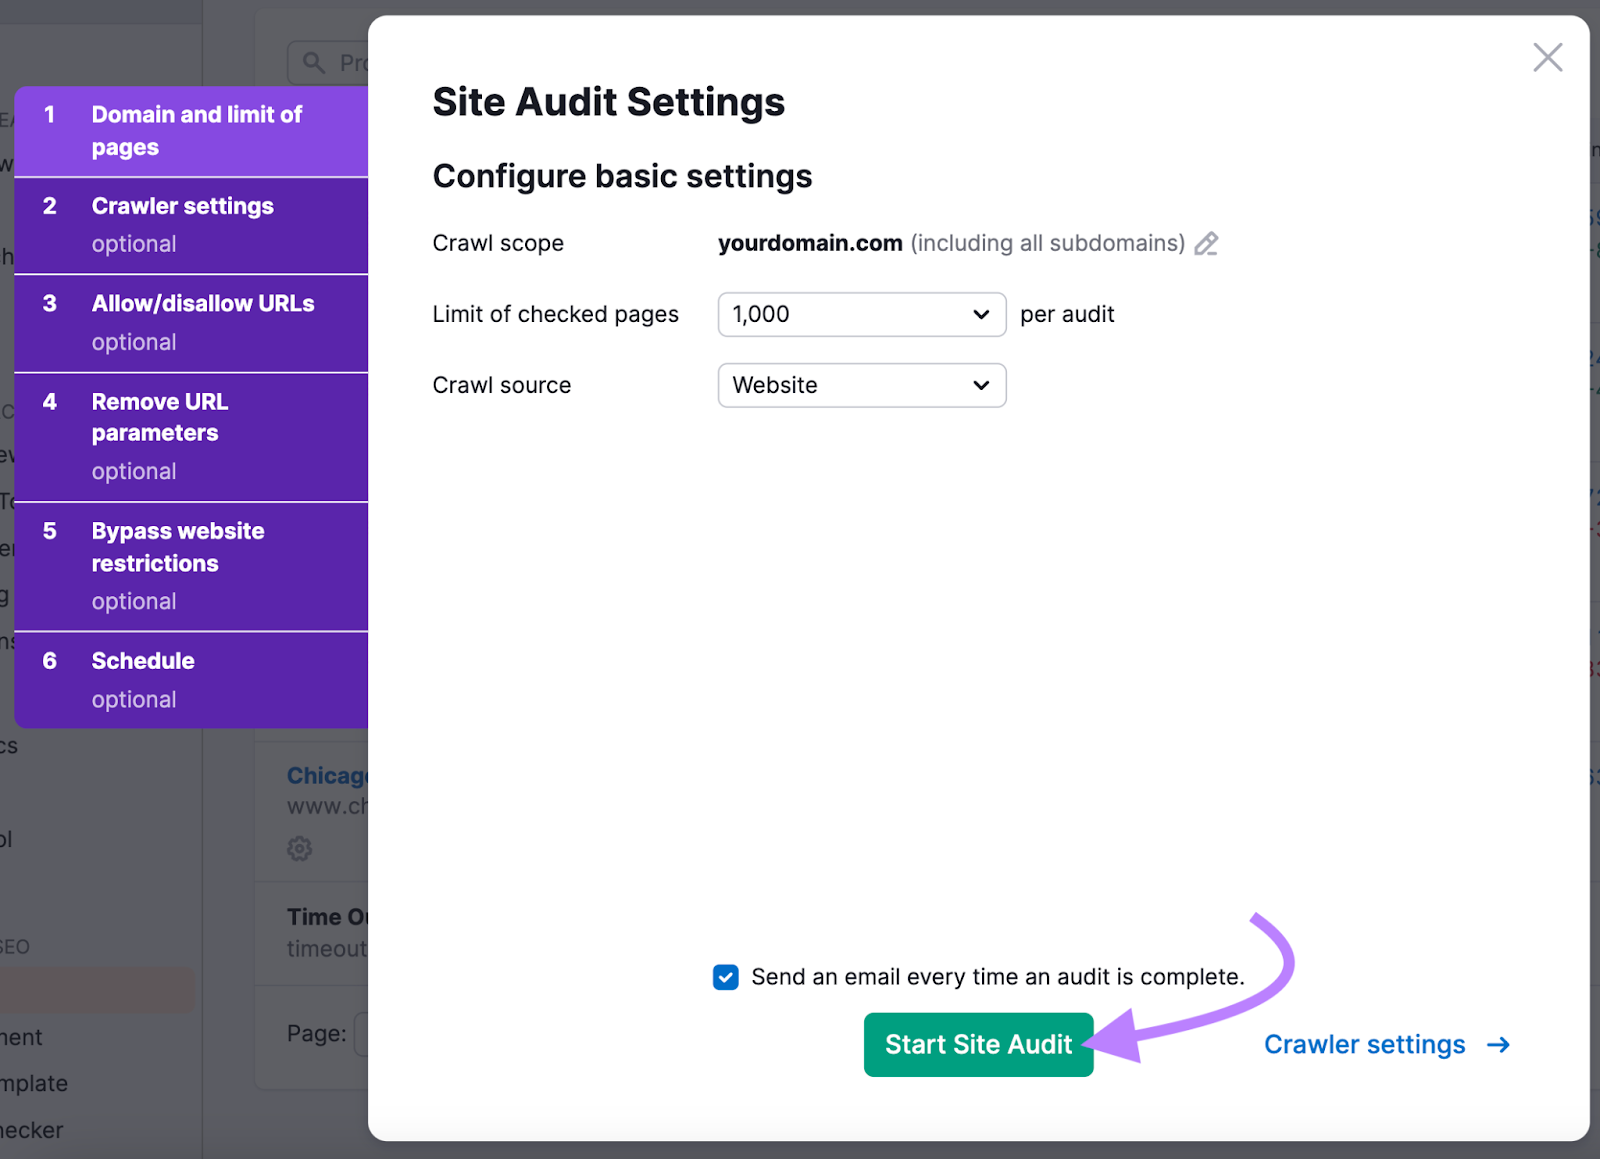
Go to the tool, enter your domain name, and hit the “Start Audit” button.

You’ll see a menu where you can configure your audit settings.
When you’re ready, click “Start Site Audit.”
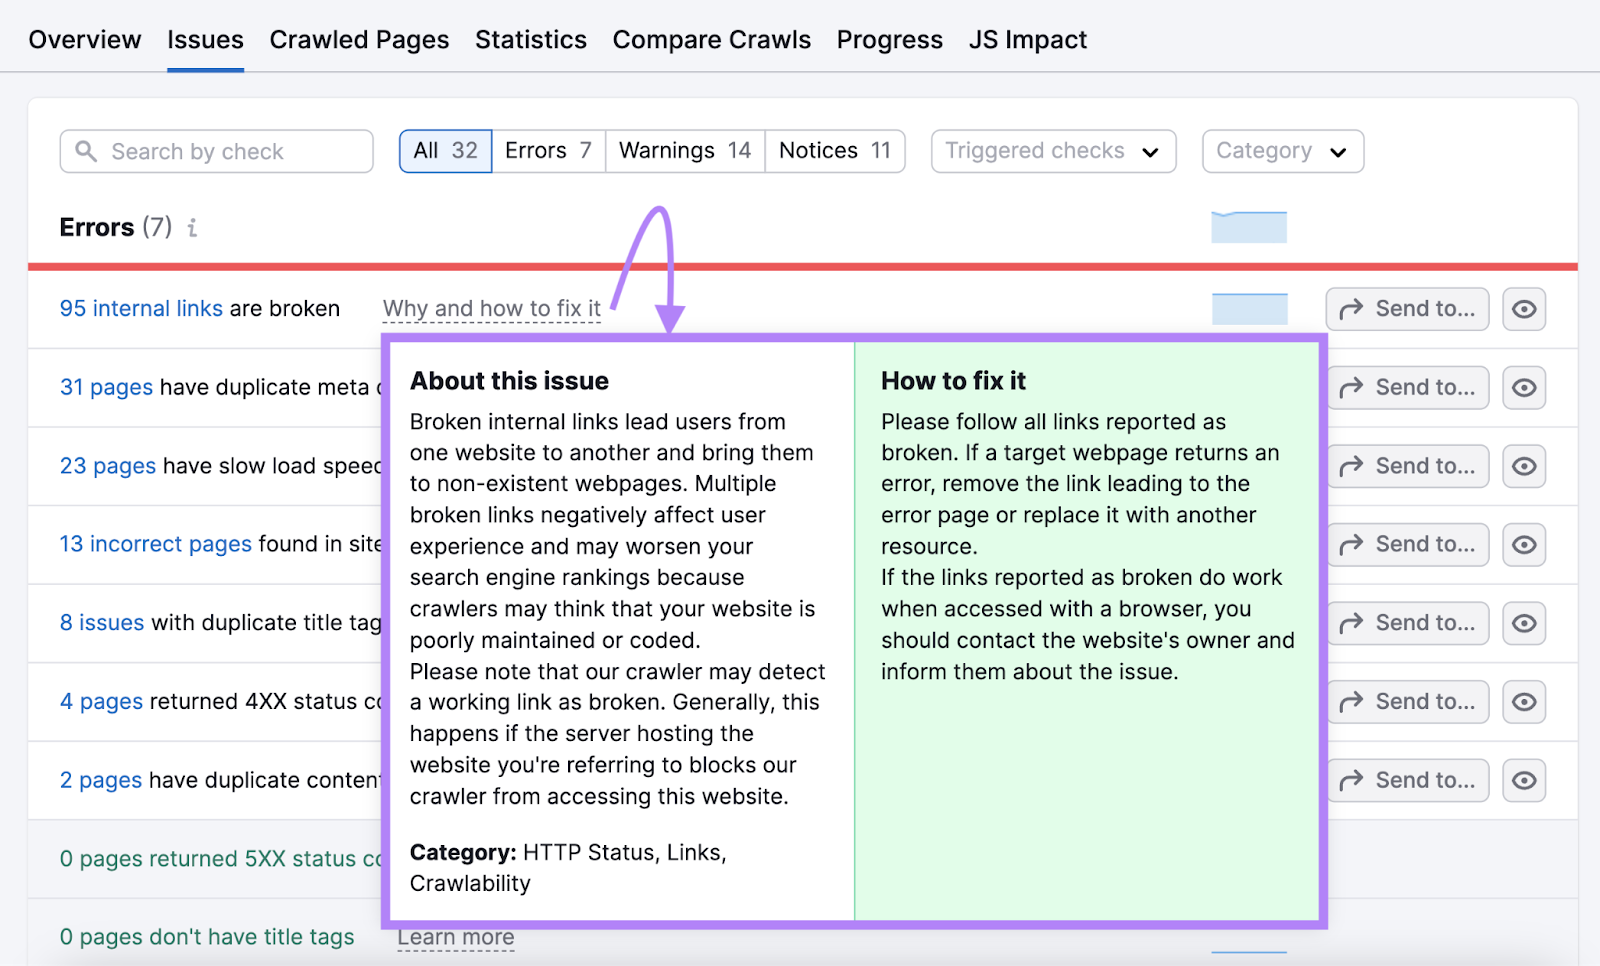
When your audit is complete, you’ll see a detailed report of your website’s overall health. For more details, click on the “Issues” tab.
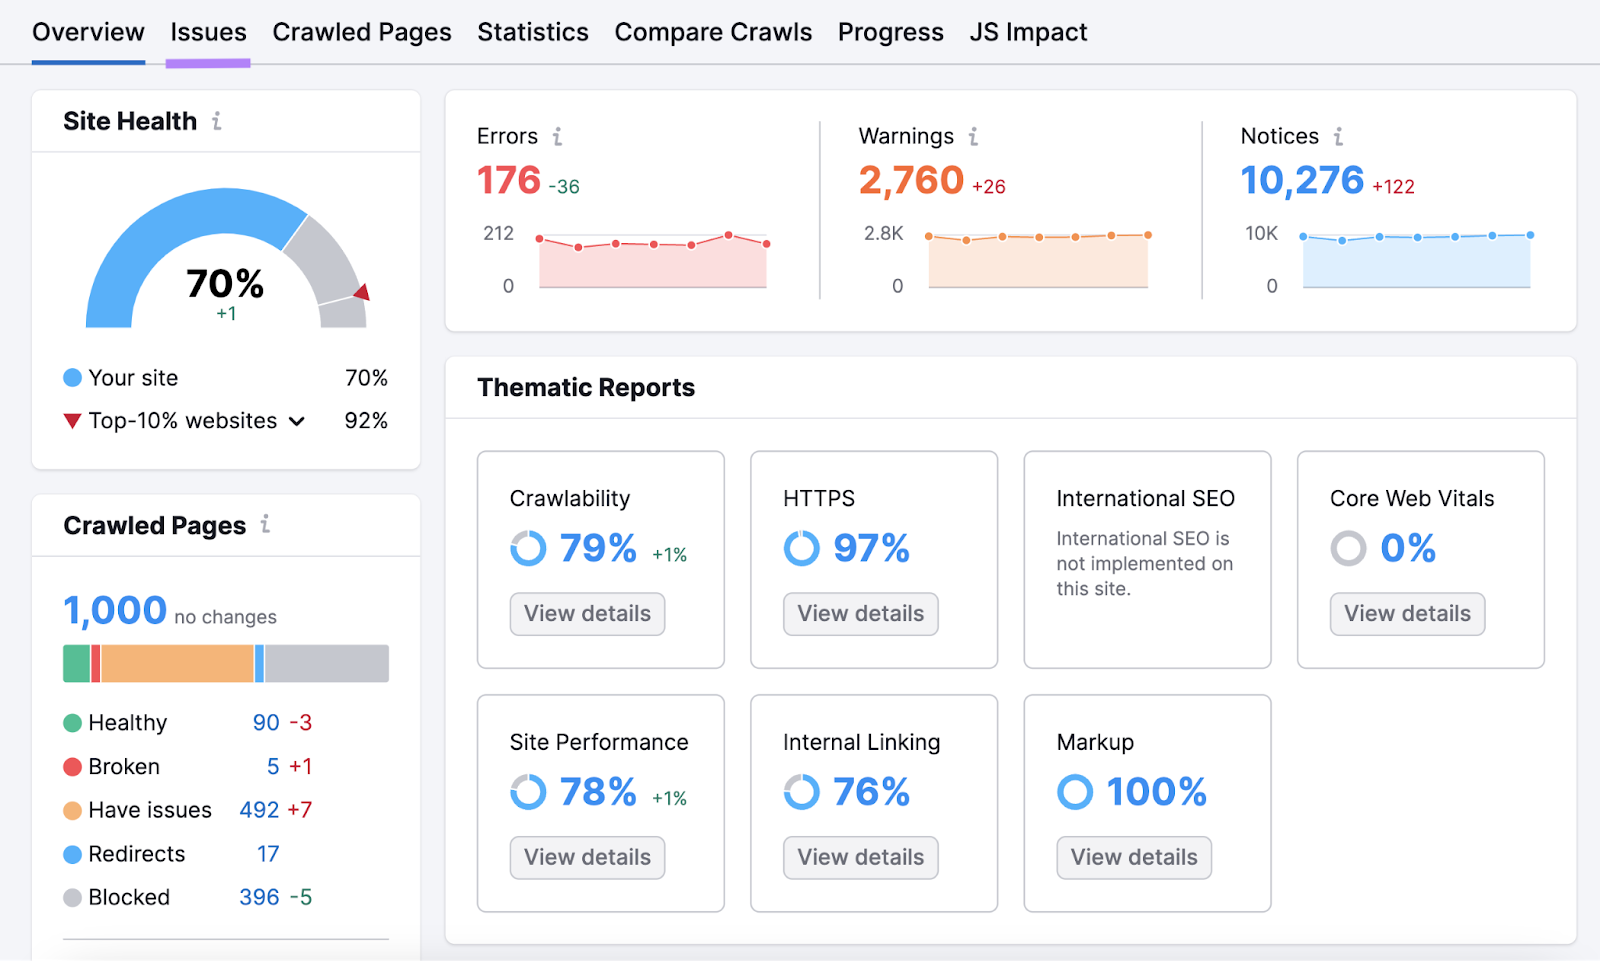
This tab will show you issues with your website. You can click on the “Why and how to fix it” text next to each issue to learn about it and how to fix it.
Solve your site’s technical issues by trying out the Site Audit tool for free.
This post was updated in 2024. Excerpts from the original article by Connor Lahey may remain.


