
Thinking about switching your website over to HTTPS?
This guide covers the key differences between HTTP vs. HTTPS, the benefits of using HTTPS, and how to migrate from HTTP to HTTPS step by step.
But before that, let’s cover some basics.
What Is HTTP?
HTTP stands for Hypertext Transfer Protocol. It’s a set of rules that allows web browsers (like Chrome or Safari) to communicate with web servers (the computers that host websites).
HTTP uses a request-response model.
For example, when you enter a website address into your browser’s address bar, your browser sends a request to the server.
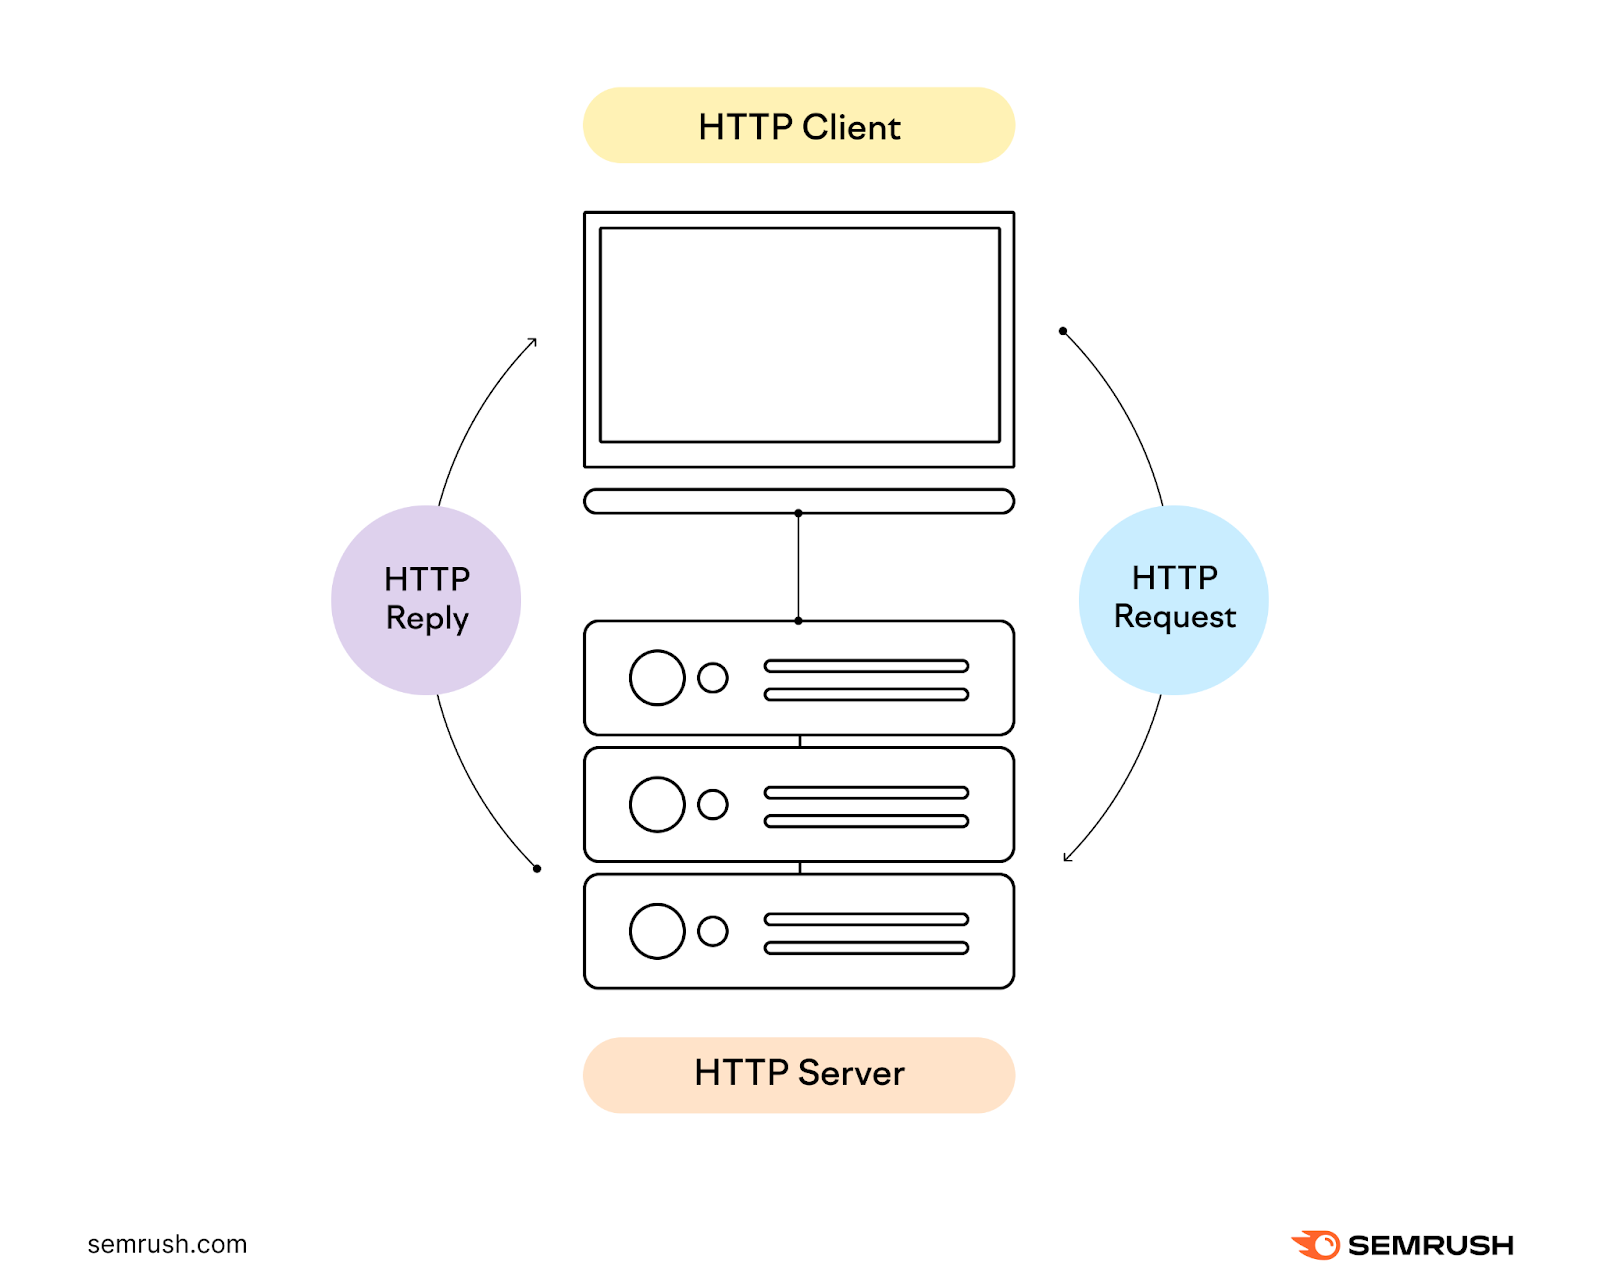
Once the server transfers the resource to the browser, the connection between them closes. Your browser establishes new connections as needed when you navigate to other webpages on the site.
The protocols defined by HTTP were foundational in creating the World Wide Web as we know it today.
But HTTP has some significant drawbacks:
- HTTP traffic is unencrypted and sent as plain text. This means anyone on the same network can easily intercept and read all transferred data.
- There is no way to authenticate or verify the identity of a website accessed over HTTP
- HTTP offers no protection against tampering. Attackers can modify data before reaching its destination.
- Websites accessed over HTTP are vulnerable to threats like session hijacking, man-in-the-middle attacks, and data leaks.
Browsers—such as Google Chrome—may also block content and URLs served over HTTP by triggering a “Not Secure” page similar to the one below.
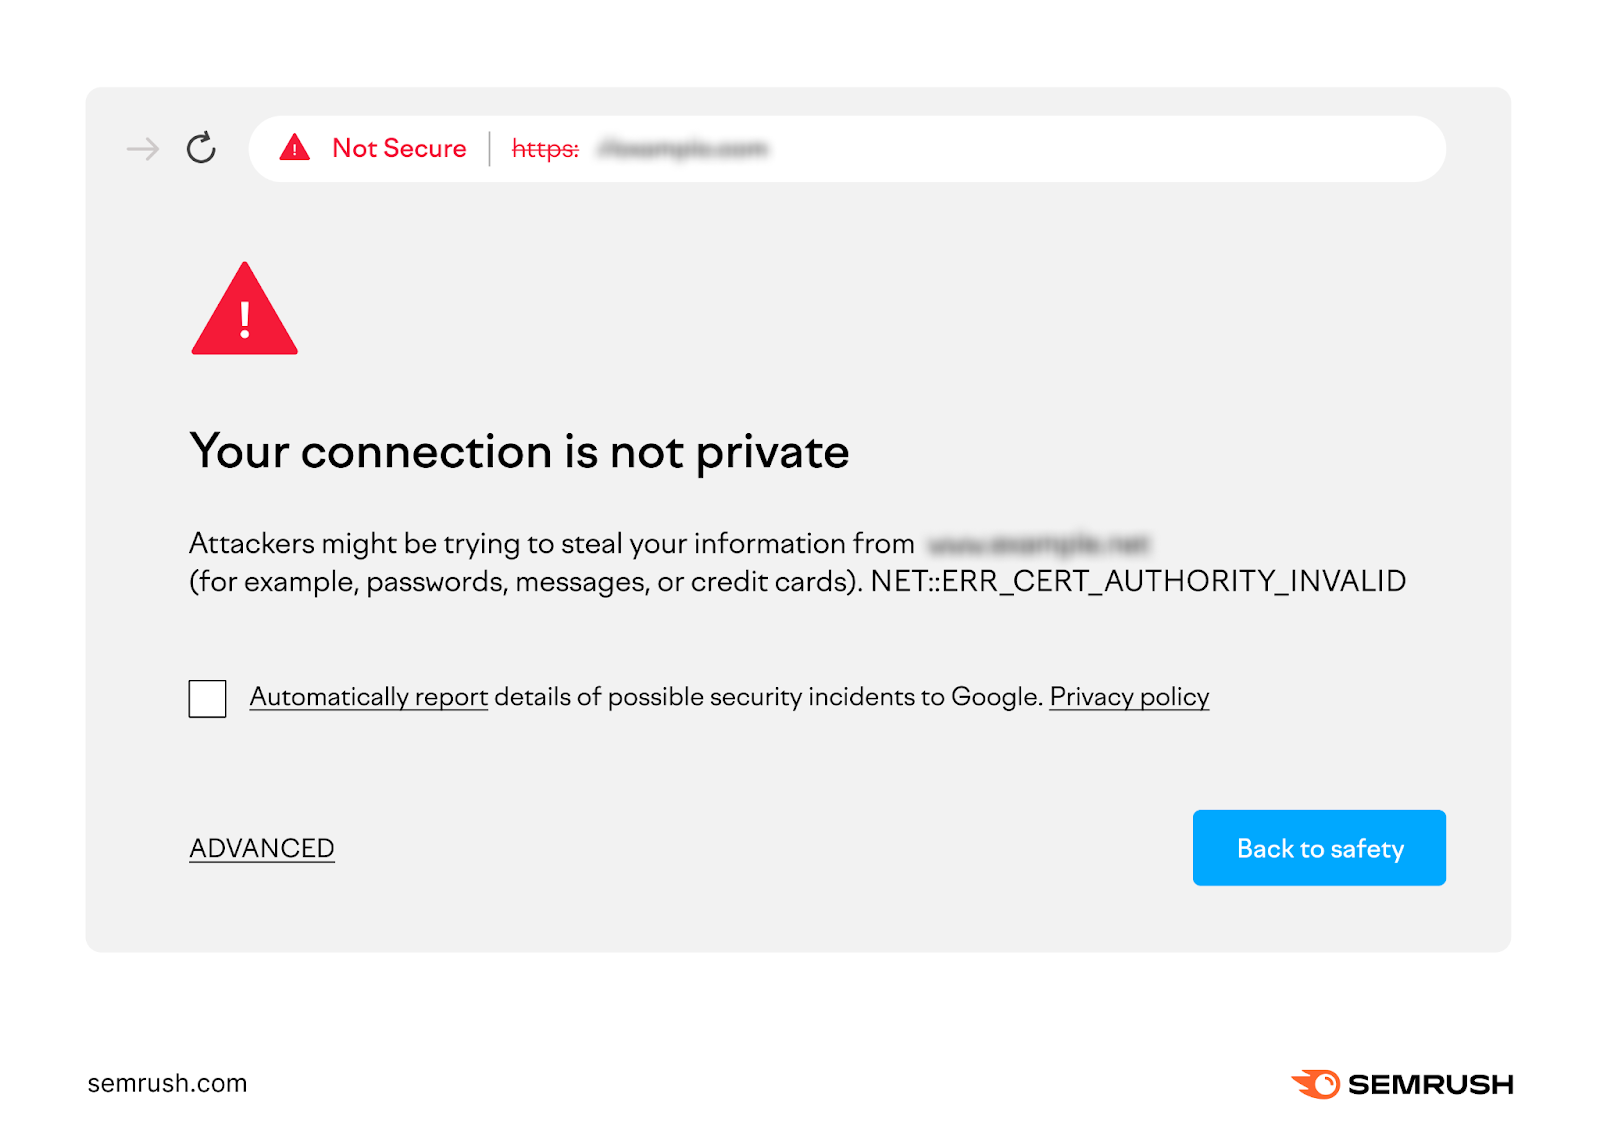
The security issues around HTTP opened the door for HTTPS.
What Is HTTPS?
HTTPS (Hypertext Transfer Protocol Secure) is a secure version of HTTP with added encryption.
HTTPS uses an encrypted connection to communicate between the server and the browser. This encryption technology used in HTTPS is known as a secure sockets layer (SSL) and transport layer security (TLS) certificate.
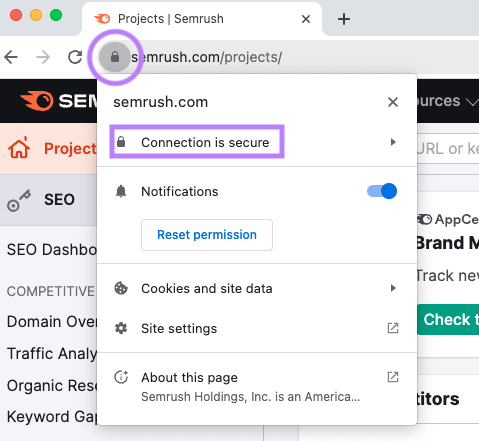
A padlock icon next to the address bar signals an HTTPS connection to a website is secured by a valid SSL/TLS certificate:
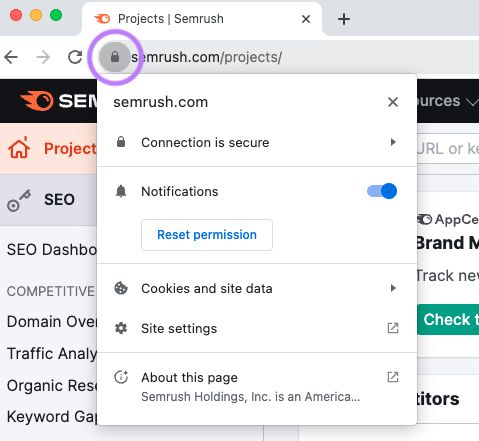
SSL/TLS certificates contain public and private encryption keys to secure data transfers between browsers and websites.
The encryption keys contained in the certificates encrypt communication between the browser and server to prevent unauthorized access. This prevents hackers from accessing your information.
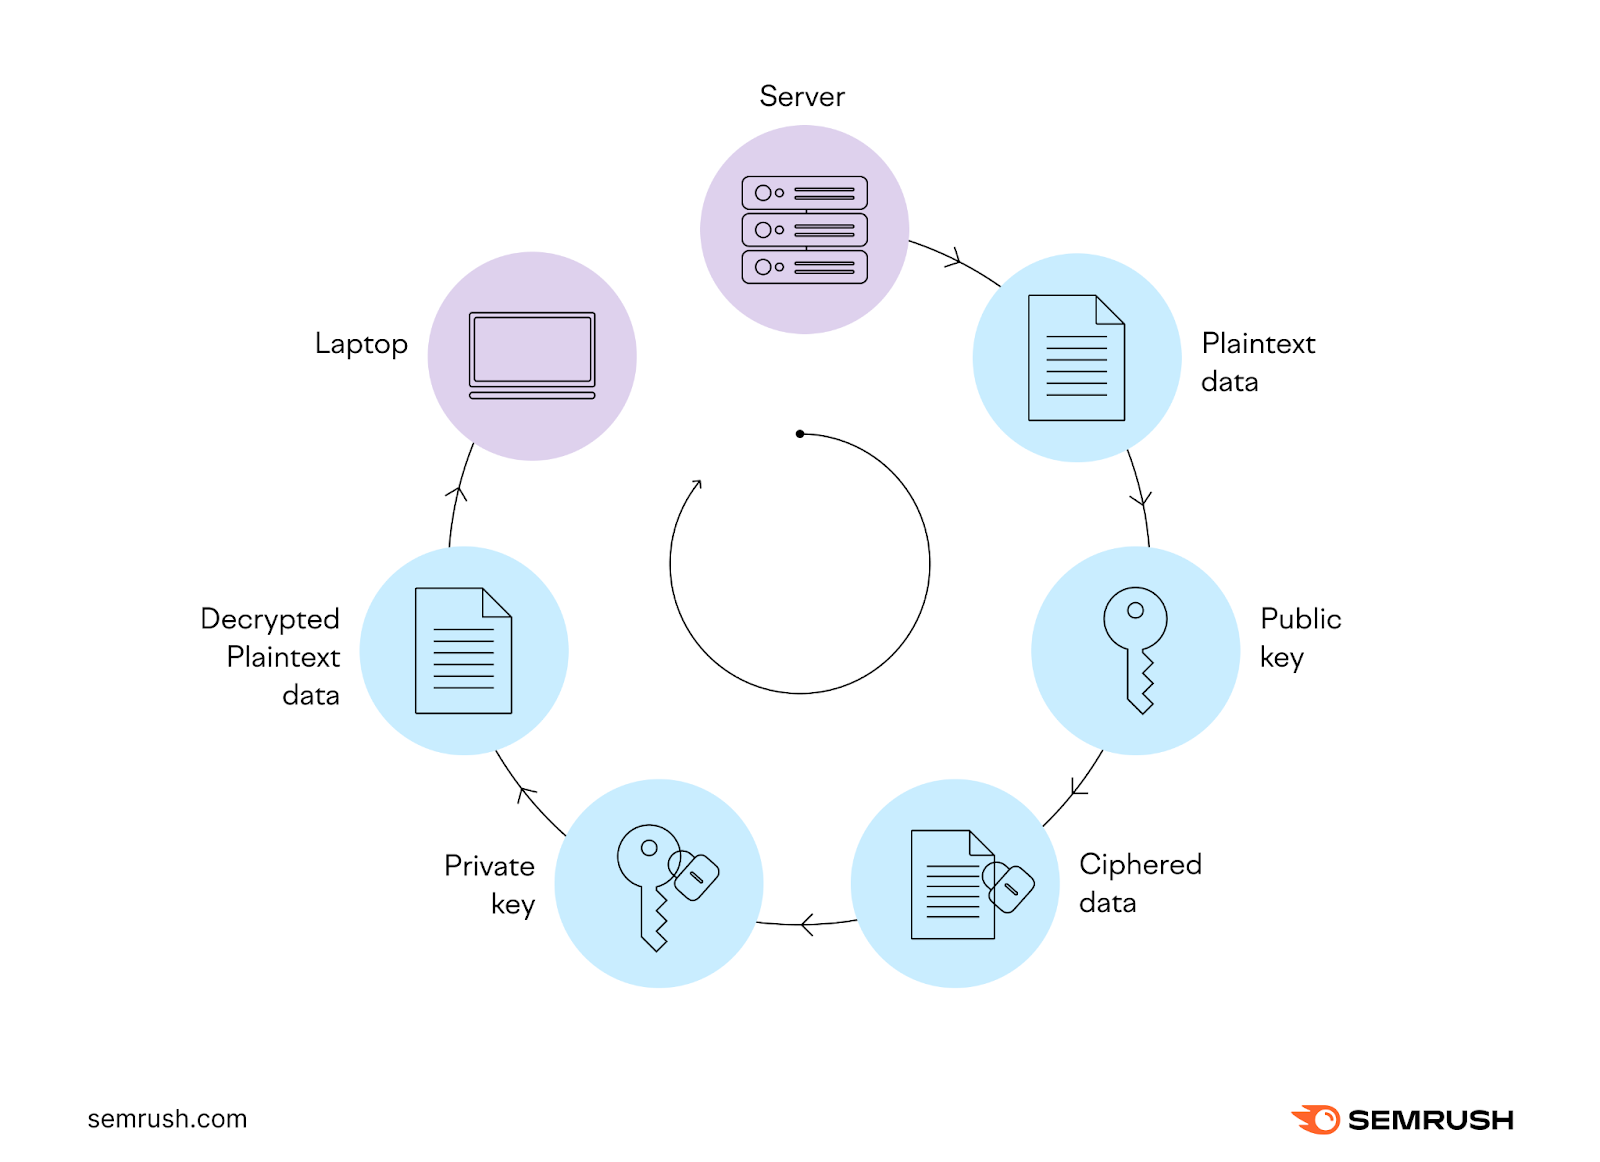
The mechanisms of SSL/TLS certificates include:
- Encryption: Certificates contain keys to encrypt communication between browsers and servers using SSL/TLS protocols. This prevents third parties from accessing data in transit.
- Authentication: Certificates validate the identity of websites. Visitors can verify they are communicating with a legitimate site, not a fake one.
- Data Integrity: The encrypted connection enabled by certificates prevents tampering with data during transfers
These mechanisms allow SSL/TLS certificates to secure user data and activity by encrypting communication with the website.
Types of SSL/TLS Certifications
There are three types of SSL/TLS certificates: Domain Validation (DV), Organization Validation (OV), and Extended Validation (EV) certificate.
|
Type |
What it’s used for |
Best for |
|
Domain Validation (DV) |
Validates ownership of the domain name only. No organization validation. |
Personal websites, blogs and basic encryption needs. |
|
Organization Validation (OV) |
Validates identity of the business/entity owning the domain. Verifies organization’s operational and legal existence. |
Small-medium businesses, ecommerce sites handling transactions. |
|
Extended Validation (EV) |
High assurance certificates that require extensive verification steps. Validates legal, physical and operational details about an organization. |
Financial institutions, payment gateways handling sensitive data. |
SSL/TLS certificates can also be categorized by the number of domains they cover:
- Single domain: Secures one domain name
- Wildcard: Secures an unlimited number of subdomains of a base domain
- Multi-domain: Secures multiple different domain names
Certificates are issued and validated by Certificate Authorities (CAs) to authenticate website identities.
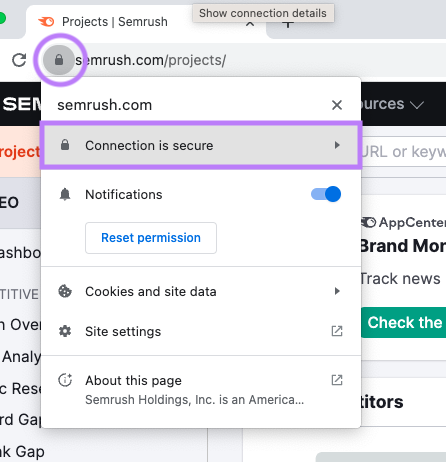
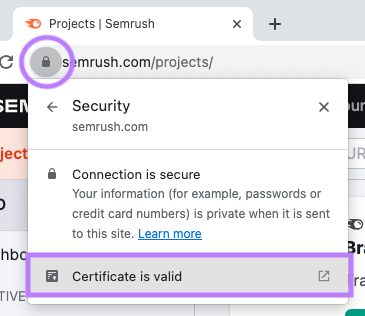
You can check a website’s certificate by clicking on the padlock and then “Connection is secure”:
And then “Certificate is valid”:
You should see a window that looks like this:
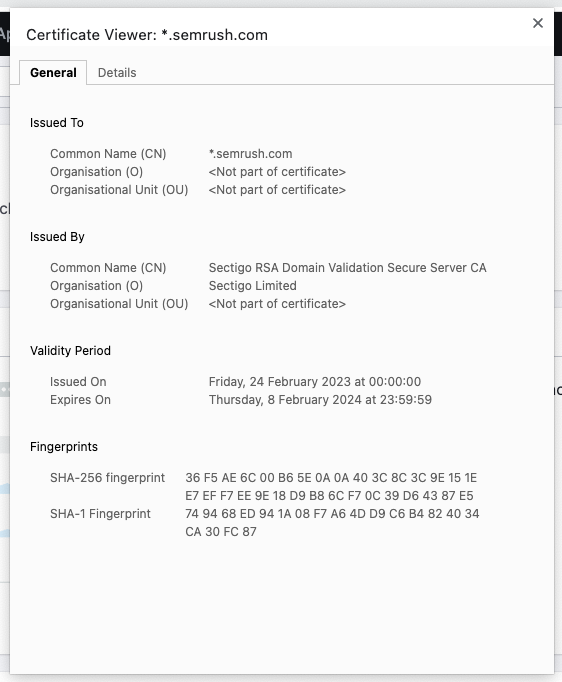
This window will show you details such as when the certificate was issued and who issued it.
Difference Between HTTP vs. HTTPS
The main difference between HTTP and HTTPS is that HTTP enables data transmission on the web, but HTTPS adds encryption through SSL/TLS to secure connections between browsers and servers.
This encryption scrambles communication to prevent unauthorized access to sensitive data like passwords, personal info, or credit cards.
HTTP, on the other hand, sends data in plain text with no encryption, authentication, or integrity checks. Your data is sent openly and can be read by others.
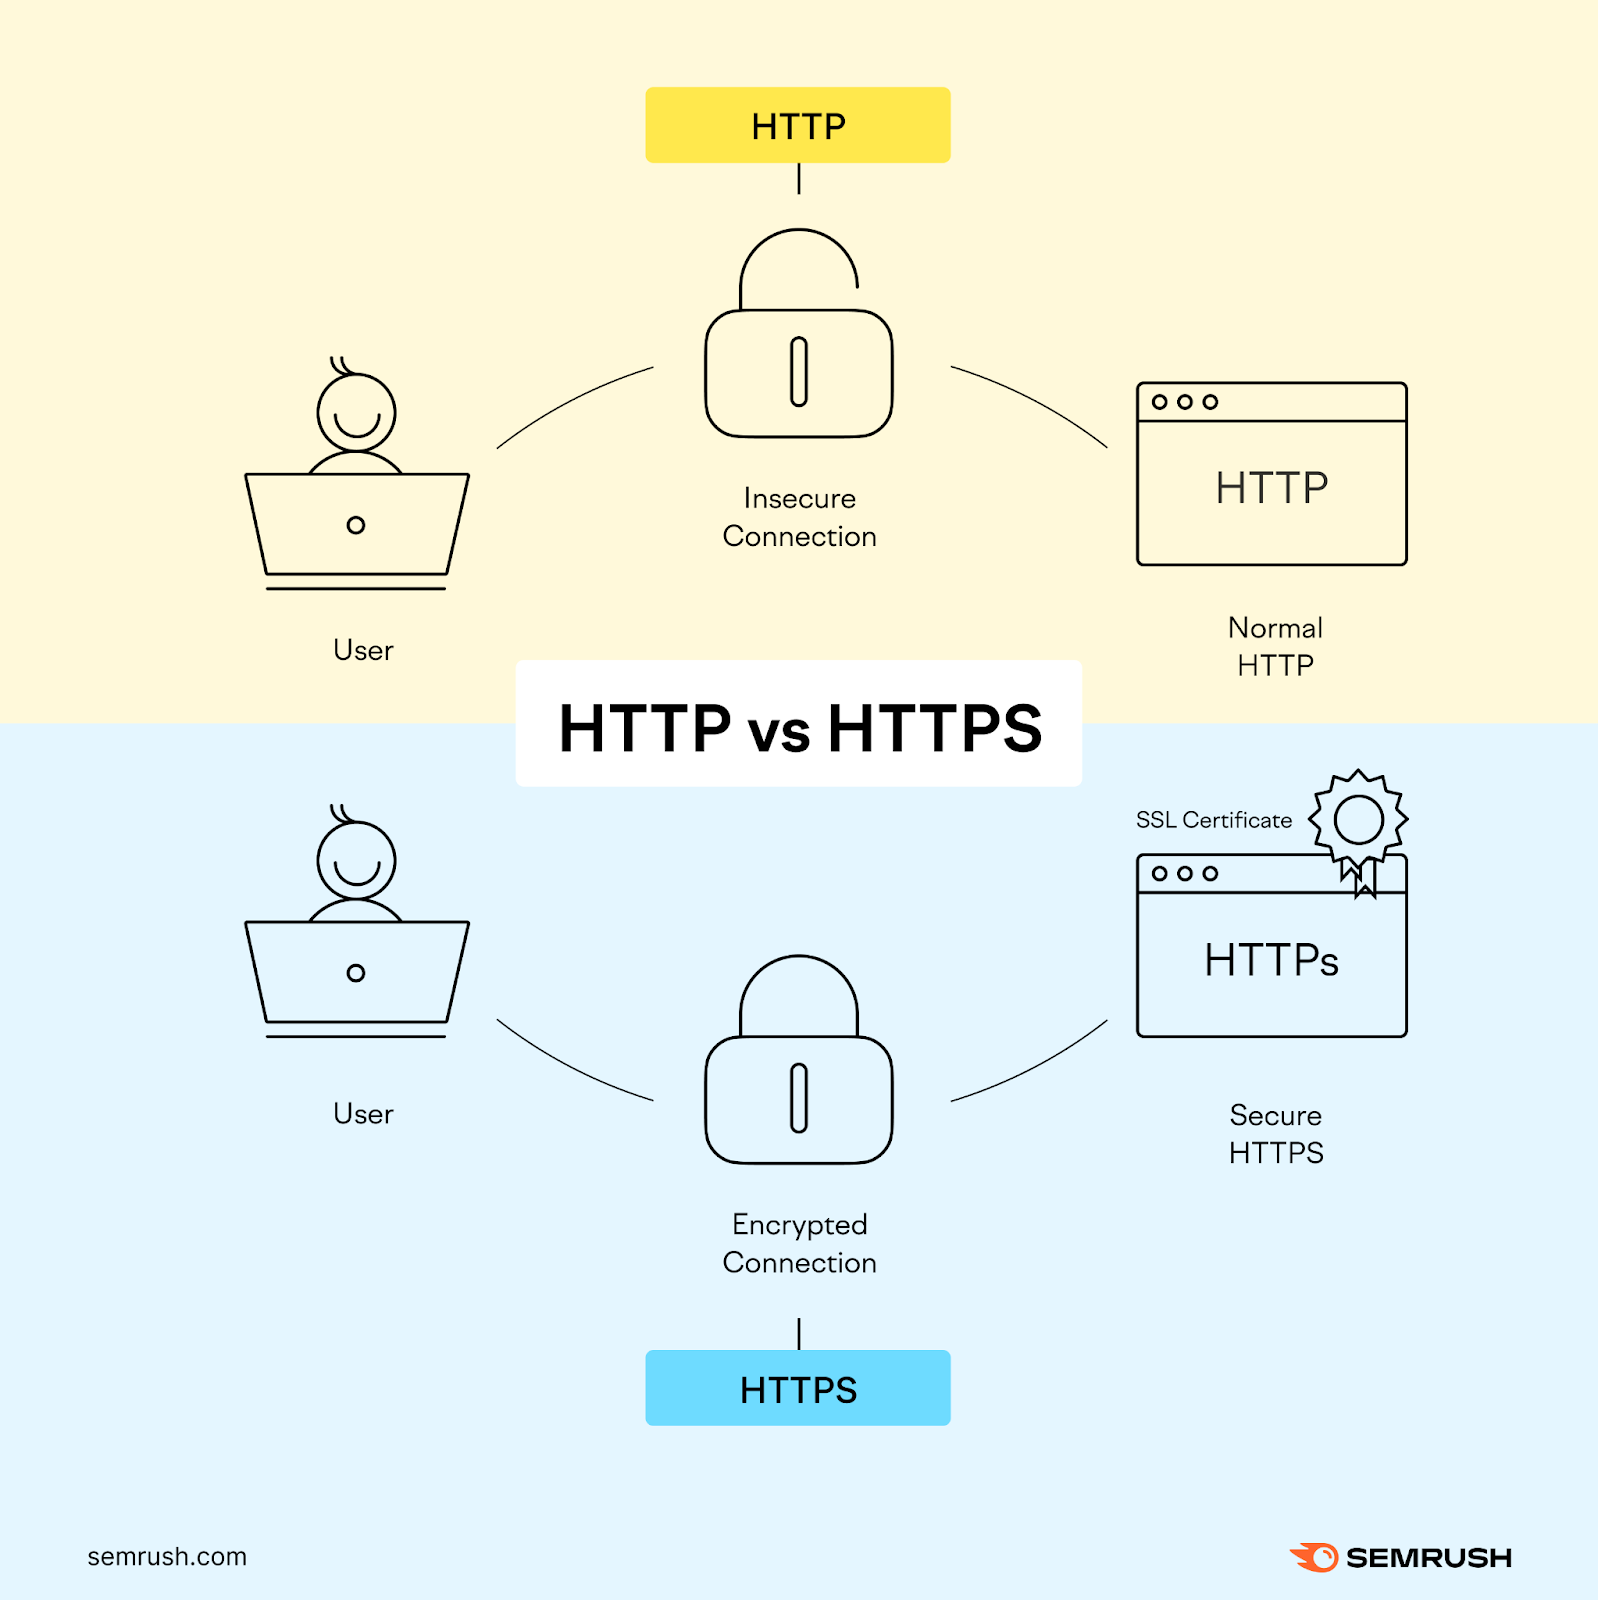
So, HTTP is like sending a post card—anyone can read it. HTTPS is like sending a letter in a sealed envelope—only the sender and recipient can read it.
What Are the Benefits of Using HTTPS on a Website?
Let’s take a look at the main benefits of using HTTPS on your website:
- Data security: HTTPS encrypts all communication between browsers and servers, preventing interception of sensitive user information like passwords, credit cards, or personal details as it travels back and fort
- Protection against cyber threats: HTTPS authentication helps to prevent common threats like phishing and man-in-the-middle attacks targeting unencrypted connection.
- Builds user trust:The padlock icon signals there is a secure connection. Users feel safer entering data and interacting on sites protected by HTTPS.
- Improve SEO ranking: Switching to HTTPS can improve a website’s SEO ranking because Google favors HTTPS sites over plain HTTP in search results
Ready to switch your site to HTTPS?
Here’s a step-by-step guide to migrate from unsecured HTTP to encrypted HTTPS.
How to Migrate from HTTP to HTTPS
You’ll be glad to know that switching to HTTPS is relatively straightforward.
Let’s run through how to migrate from HTTP to HTTPS.
1. Purchase an SSL Certificate
First, decide on the type of certificate you need based on website traffic and data sensitivity.
Your options are Domain Validation (DV), Organization Validation (OV), Extended Validation (EV).
Remember that SSL/TLS certificates can also be categorized by the number of domains they cover.
A single-domain certificate is sufficient if you have a single-domain website (like example.com).
If your website has subdomains like blog.example.com or store.example.com, you likely need a wildcard certificate to secure the base domain and all subdomains.
You’ll need a multi-domain certificate to cover all domains if you have multiple separate domains (like example.com and exampleshop.com).
You can buy SSL certificates through certificate authorities like DigiCert or Comodo. Many web hosting companies (like GoDaddy or Namecheap) sell SSL certificates or include a free SSL certificate as part of their hosting plans.
However, research thoroughly if you purchase your certificate from a third-party vendor.
2. Install Your SSL Certificate and Create a Sitewide 301 Redirect
Once you have the SSL certificate, work with your web hosting provider to install it on your website.
Most hosting companies will have documentation on activating SSL certificates on their platforms. Or you may be able to reach out to their support team to help you with activation.
But HTTP URLs will not automatically redirect to HTTPS URLs after installation.
You need to implement a sitewide 301 redirect from HTTP to HTTPS URLs through your web hosting, editing your site’s .htaccess file, or through a WordPress plugin like Really Simple SSL.
Further reading: How to Redirect HTTP to HTTPS (+ Best Practices)
Once you’ve created your redirects, verify that the padlock icon shows in the browser bar and the connection is secure.
3. Check for Any HTTPS Implementation Issues
When migrating your website from HTTP to HTTPS, internal links will not automatically switch from HTTP to HTTPS.
Any internal links pointing to the old HTTP URLs could result in an HTTP status code error such as a 404 (page not found).
So, it’s a good idea to double-check that internal links and resources like images, CSS, and JavaScript files are loading securely over HTTPS and create 301 redirects if needed.
You can use Semrush’s Site Audit tool to catch HTTPS implementation issues.
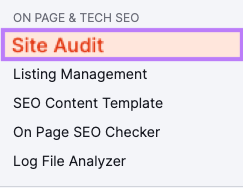
First, select “Site Audit” from the left-hand menu and click “+ Create project.”
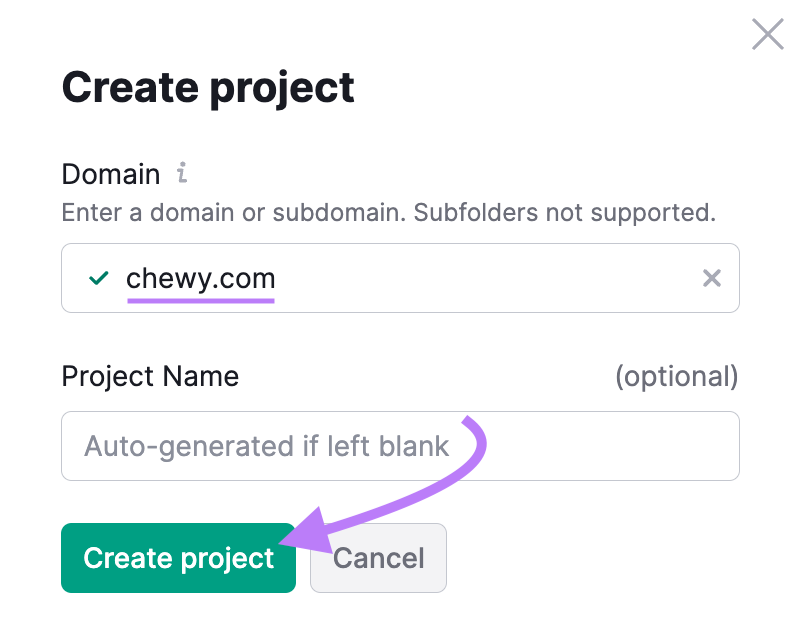
Enter your domain and a project name in the “Create project” window. Then click “Create project.”
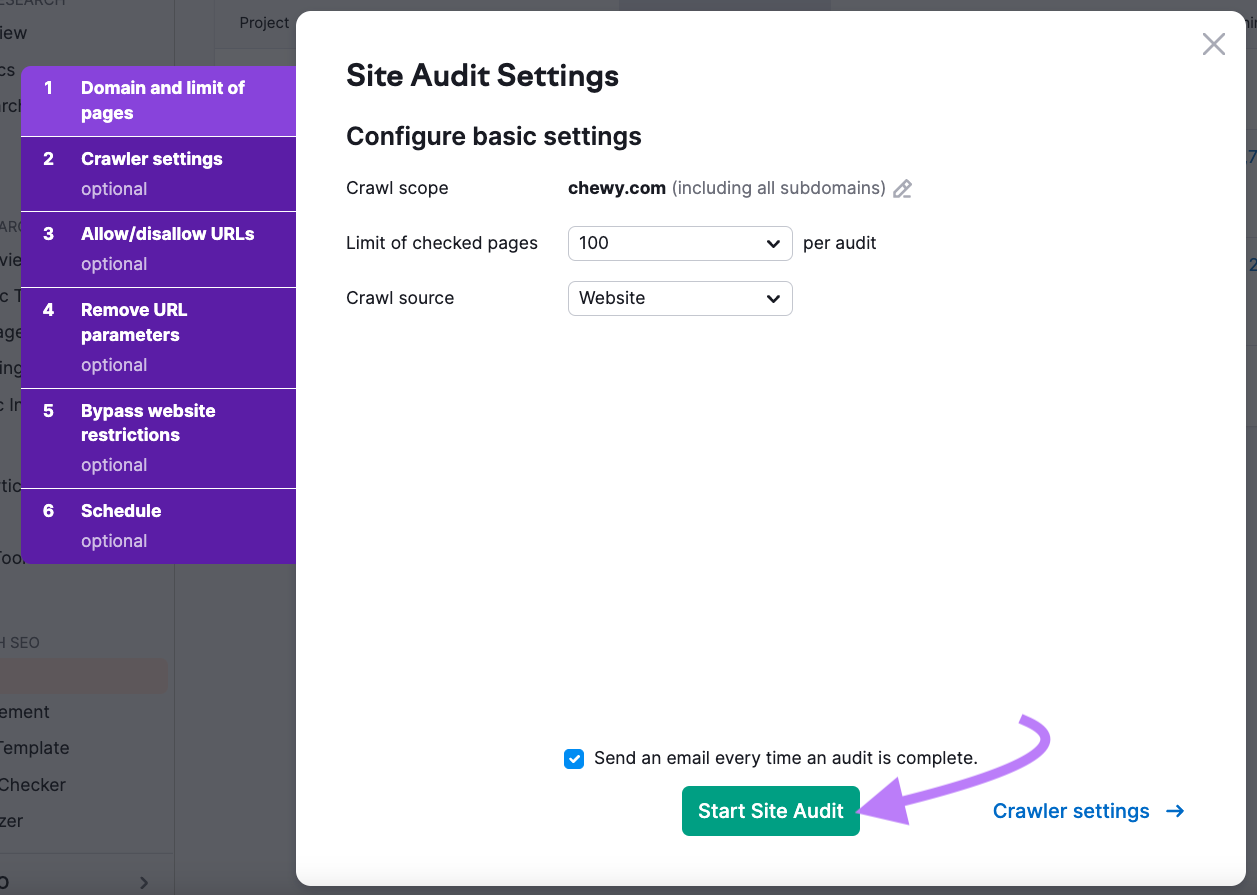
Go through the configuration steps on the “Site Audit Settings” window. Then click “Start Site Audit.”
And then click “View details” under the “HTTPS” heading.
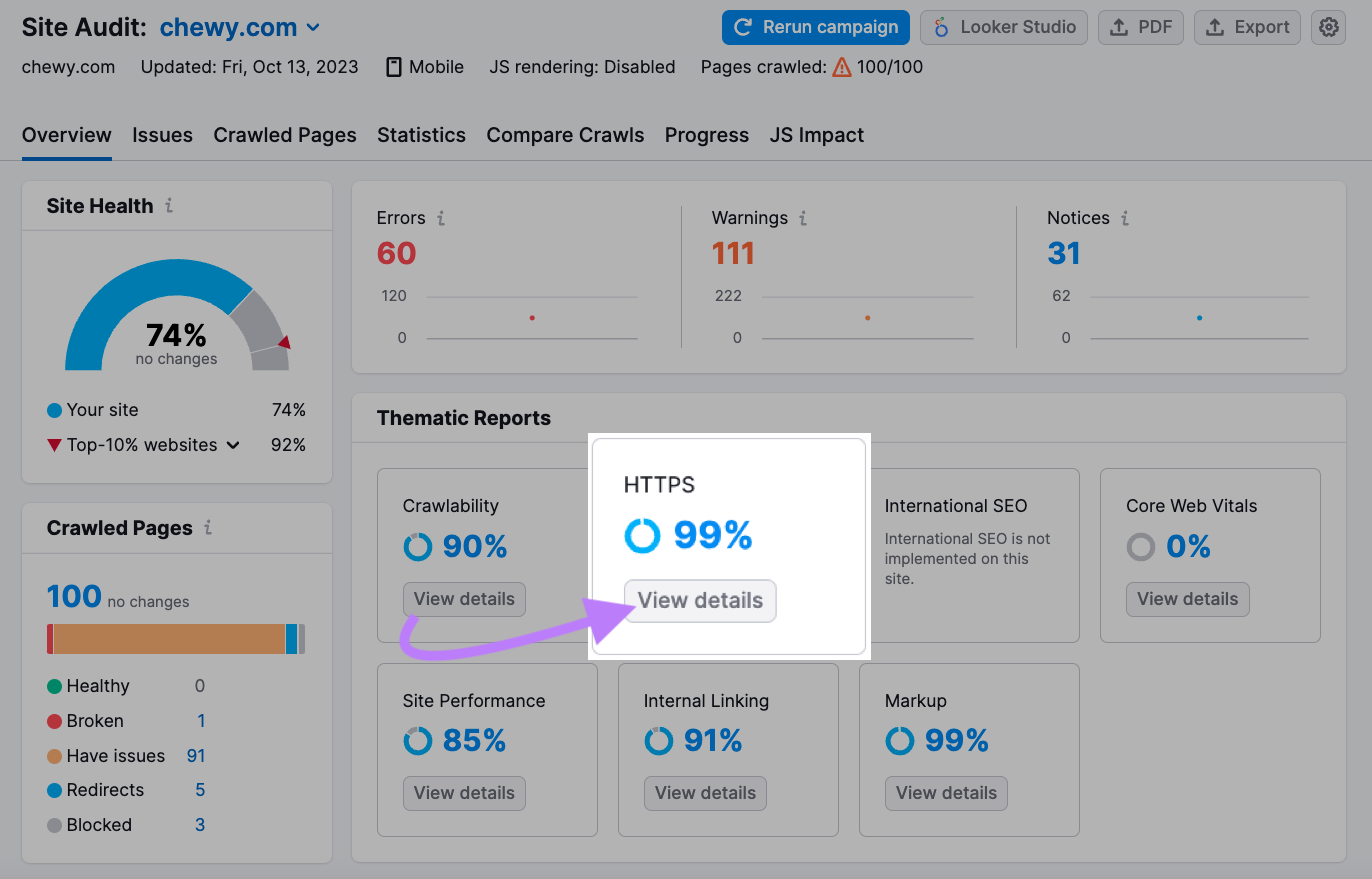
This will take you to the “HTTPS Implementation” report and highlight any potential issues with your HTTPS migration.
Including:
- Certificate registration
- Subdomains not supporting HTTPS
- Website architecture (including internal link issues)
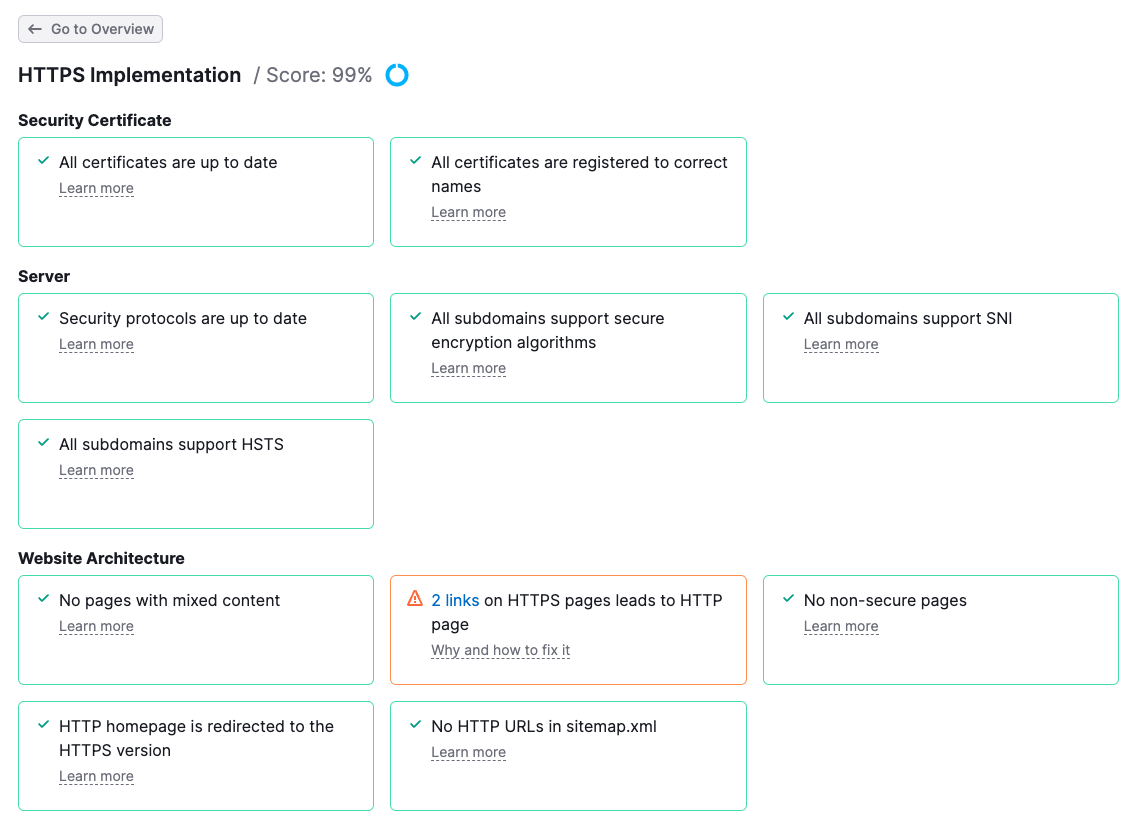
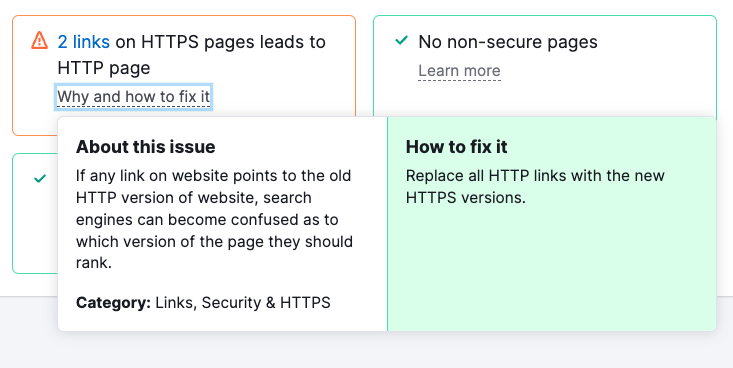
You can click on any of the blocks for more information on each issue and how to fix it.
For example, the “X links on HTTPS pages leads to HTTP page” block will tell you if you need to set up your 301 redirects from old HTTP pages to new HTTPS versions.
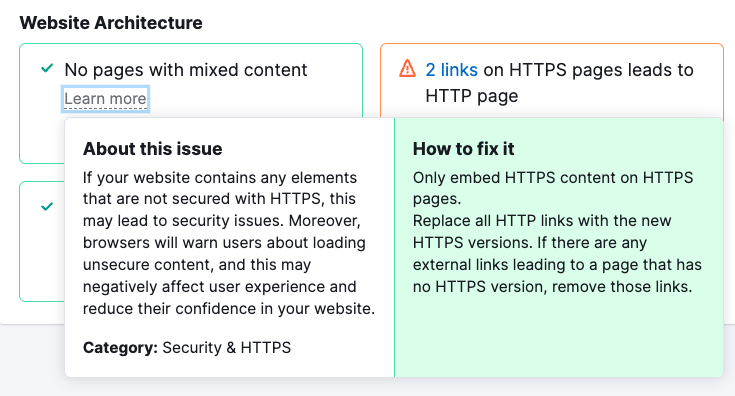
And if you have images and other elements on your site loading over HTTP, you will see this in this “mixed content” block.
4. Update Your Sitemaps
Search engines need to know about your new HTTPS URLs in order to index and rank your secure site properly.
So, after migrating to HTTPS, generate a new XML sitemap containing your updated HTTPS URLs and submit it to search engines for indexing.
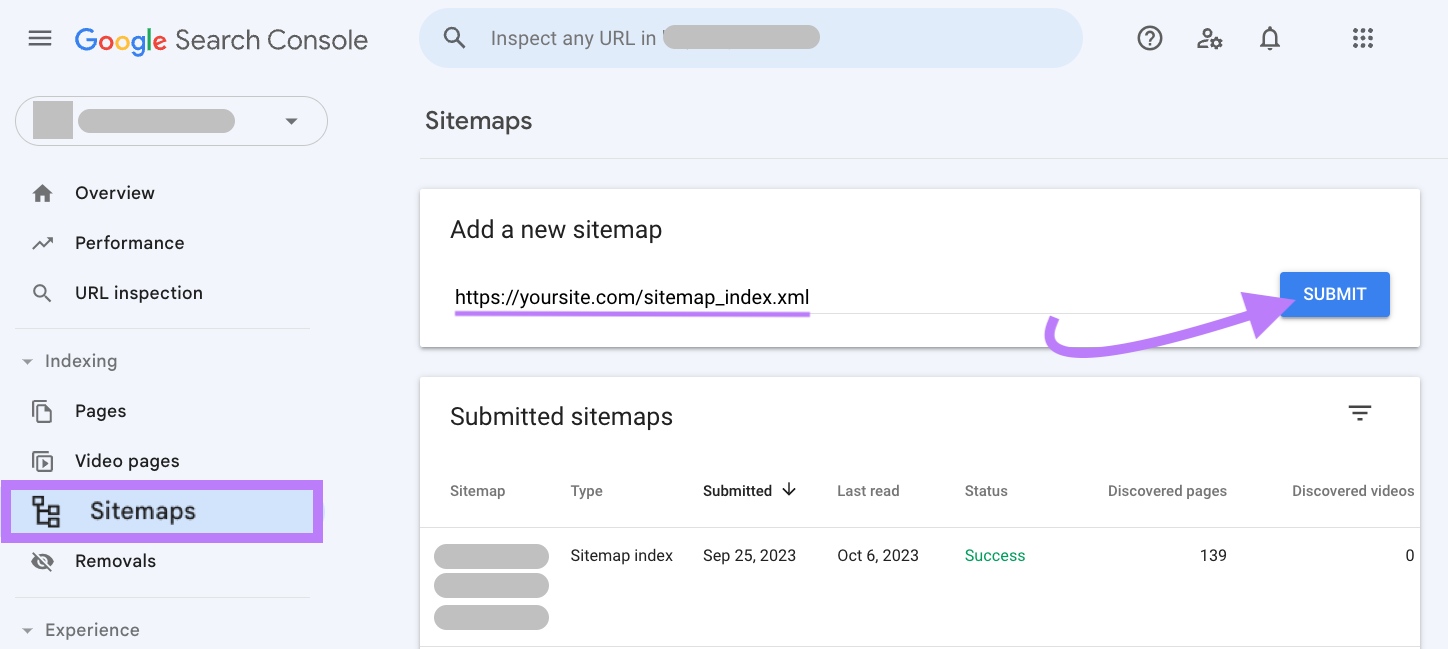
For example, if you’re using Google Search Console (GSC), head to the “Sitemaps” tab on the left-hand side of your screen.
Enter the sitemap URL into the provided field and click the “Submit” button.
In the past, you had to verify HTTP, HTTPS, www, and non-www versions of your site separately in GSC. This made it hard to get a complete view of your organic search performance.
The Domain property feature lets you verify and view data for your whole domain together, giving you the full picture of how Google sees your site.
HTTP vs. HTTPS: Which Should You Choose?
HTTP is now considered obsolete and insecure for websites. All sites should be using HTTPS encryption by default, even if they don’t handle sensitive information.
Failing to switch from HTTP exposes your website and users. And visitors may hesitate to share information or buy products on your site without it.
The good news is that switching to HTTPS has never been easier.
If you want to learn more about going from HTTP to HTTPS the right way, check out our guide:
Or use Semrush’s Site Audit tool to instantly check if your site is on HTTPS and identify other HTTP issues.

